Most Boiserie Is Really Molding
Most boiserie sold today is molding over drywall. What real frame and panel construction looks like, and what to ask a woodworker or an antique dealer before the paneling is specified.
Boiserie is French for woodwork. In an eighteenth century Paris room it meant a wall built as joinery, with solid oak frames holding panels that were set loose inside them. Most of what gets sold as boiserie now is something else. It is strips of molding nailed over drywall or MDF and painted so the wall reads as framed. Both have a place on a project. The difference shows up in the price, and in whether the wall can ever come down and go up again in another house.
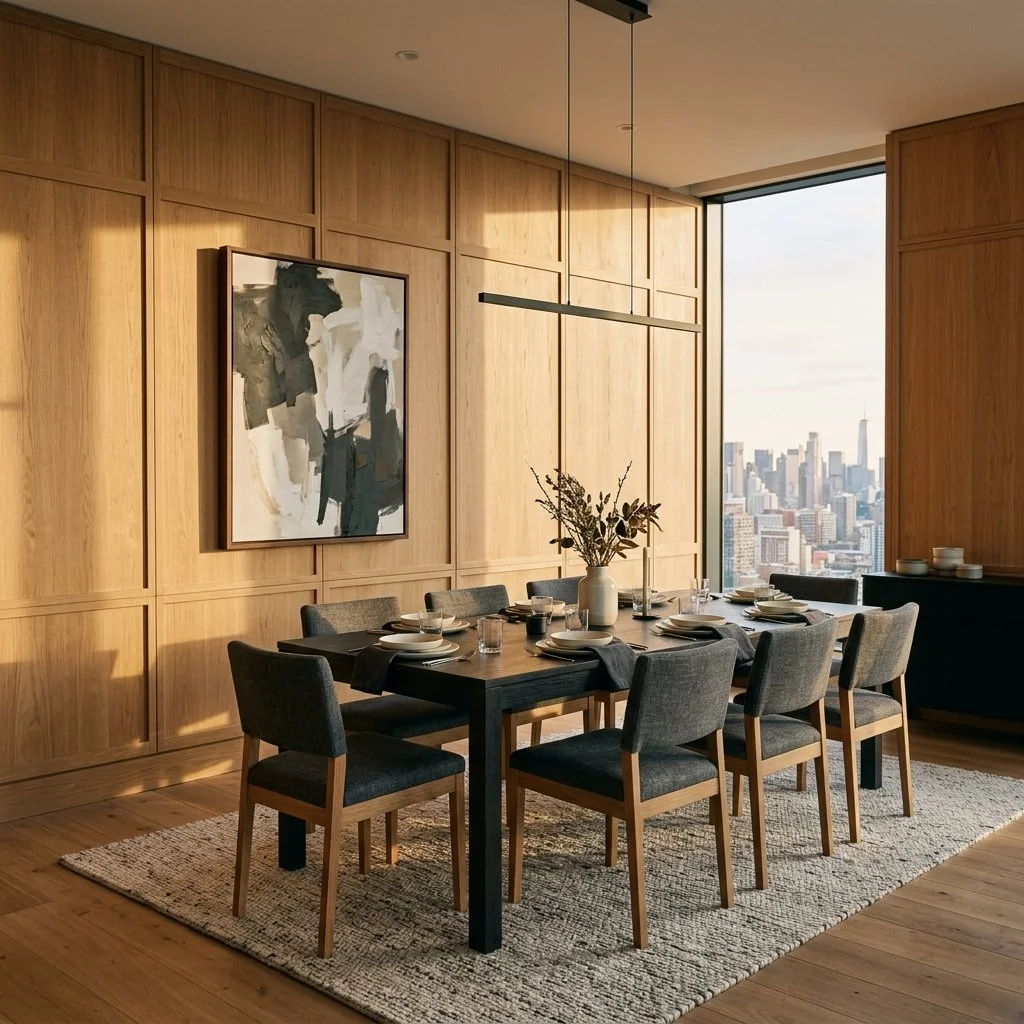
Penthouse dining room with floor to ceiling oiled oak frame and panel walls.
What Boiserie Is Made Of
A real paneled wall is frame and panel construction at room scale. Vertical stiles and horizontal rails are joined into a rigid frame, and each panel sits in a groove cut into that frame without glue. The panel is left to float, so it can swell and shrink in its groove while the frame holds its shape, as long as the house keeps its humidity steady. Paneling built that way in the 1700s still lines rooms in museums.
Most of the Paris rooms at the Met are oak. Its room from the Hôtel de Varengeville, made around 1736 to 1752, is catalogued as painted and gilded oak. Some of the finest relief was cut in a softer wood and fixed to the oak. The Salon Doré at San Francisco’s Legion of Honor pairs white oak paneling with high relief carving in linden. Painted walls follow their own rule today, the Woodwork Institute’s guide specification calls for a closed grain hardwood when paneling will be painted.
Molding on Drywall Is a Different Product
The applied version starts with a flat sheet, often MDF, fixed to the wall, with molding strips nailed over it to draw the frames. There is no panel, only painted wall surface between strips. The ornament can be high density polyurethane, a rigid plastic poured into a mold, sometimes taken from a master carved by hand. It doesn’t move with humidity the way wood does, and in a damp room that is a real argument for it.
Makers have built a middle tier. Lualdi’s Avenue paneling, designed by Robert A. M. Stern, was made to order as shaped panels in matte lacquer. David/Nicolas launched La Boiserie at Milan Design Week 2026 as part bespoke craft and part reproducible system. Systems like these can be beautiful. The specification still needs to say what sits under the lacquer.
Carved Wood and Cast Ornament
Cast work turns up even in museum rooms. The Salon Doré’s four cornices carry cast plaster ornament alongside its carved linden. Féau Boiseries is the Paris house founded in 1875 that sold antique paneling to Gilded Age American families. Under Guillaume Féau, who took over in the early 1990s, it added a line of reproductions that use resin for precise details.
I don’t think cast work cheapens a room when it sits up at the cornice, out of reach. What I want is a shop drawing that labels which elements are carved wood and which are cast, so nobody finds out with a sander.
Antique Rooms Arrive With Later Additions
French dealers have been sending antique boiserie across the Atlantic since the Gilded Age, when Richard Morris Hunt installed an antique gold paneled ballroom supplied by Allard at Marble House. Museum labels show how often those rooms changed along the way. The Met’s label for the Varengeville room ends with “with later additions.” Its Neoclassical room from the Hôtel Lauzun, made around 1770, carries one modern panel and has no known eighteenth century provenance; by 1874 it lined a collector’s library on the Île Saint-Louis, stripped to bare oak and stained a dark brown.
Dealers still sell rooms in panels, shipped to be adapted to the buyer’s space. Where a room has been is part of what the client is paying for, so the dealer should put in writing how much of it is original and what was added later. Féau dates pieces in a lab by their paint colors, so paint analysis is a fair thing to request.

Close view of carved antique wall paneling
Water Gilding or Oil Gilding
Both methods turn up on gilded paneling. Water gilding lays gold leaf over gesso and a clay layer called bole, and the bole lets the gold be burnished with an agate stone to a mirror finish beside matte areas. The Salon Doré is water gilded. Oil gilding can’t be burnished, and the Royal Collection Trust notes that most architectural gilding has been oil gilded.
When missing carvings in the Salon Doré were recut, they were water gilded to match the old work. The project summary published by the American Institute for Conservation noted that oil would have been faster. On a new wall, that tradeoff is the first thing to settle with the gilder, and it lands in the client’s budget.
Start With One Corner
Real paneling has its own place in the specification. In MasterSpec it is Section 06 42 14, Stile and Rail Wood Paneling, built to a grade in the Architectural Woodwork Standards, where Premium is the highest of three. The Woodwork Institute’s guide specification asks for a mockup of one section with an inside and an outside corner. Whoever builds it, an architectural woodworking firm for new work or an antique dealer adapting a room, should name the carver and the gilder on the job. Then study that corner. It shows whether a panel sits inside a frame or a strip of molding sits on a wall, and that difference is what the word boiserie now hides.

How Much Humidity a House Can Hold
Flooring warranties and Steinway publish different humidity numbers, health guidance adds its own, and in a cold climate the windows decide which ones a house can actually hold. How to pick the target and the steam type.
A whole house humidity system adds moisture to the air while the heat runs and pulls it out while the cooling runs, and in a house full of wood and paintings it has to hold a number someone actually chose. The flooring warranty and the piano maker each publish their own figure, and in a cold climate the windows set a ceiling below some of them. The right target is the highest humidity the glass can carry without condensation, checked against the most sensitive object in the house, and both get settled before anyone picks the equipment.
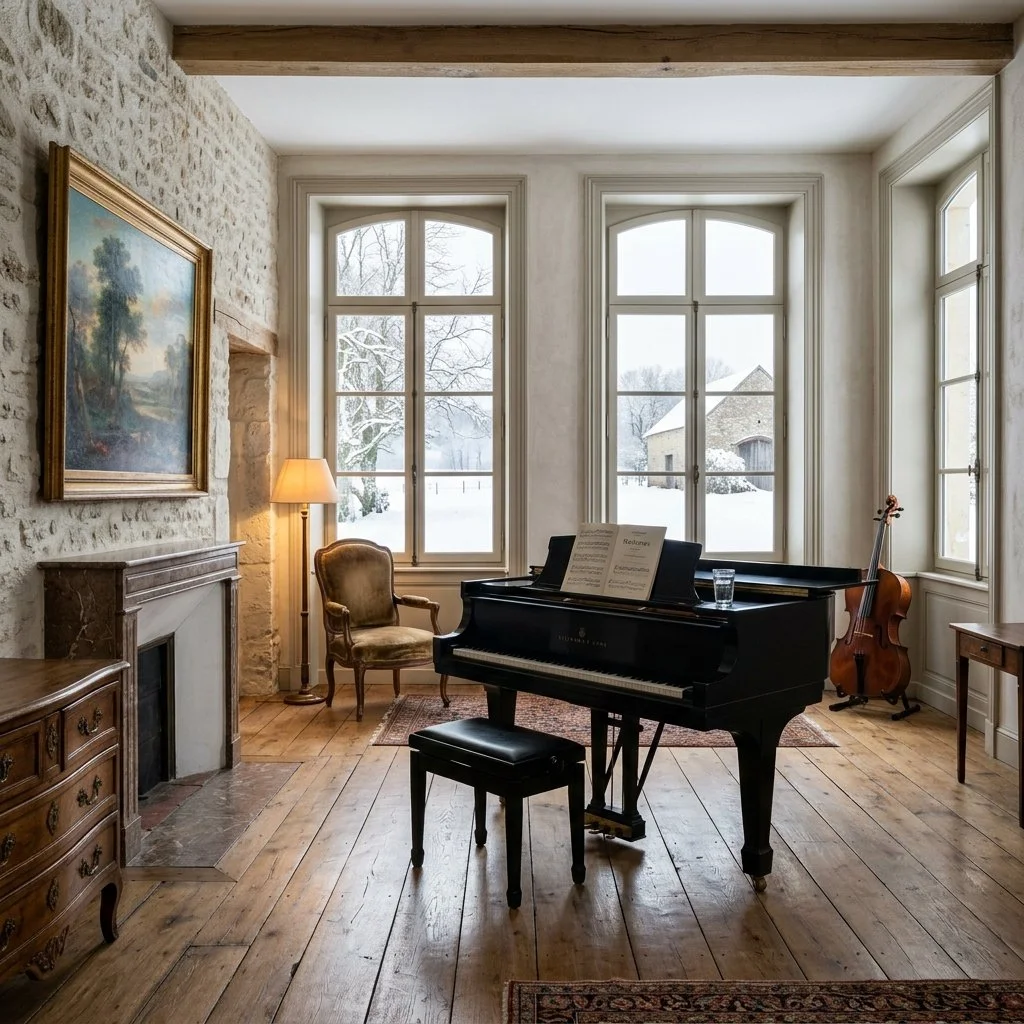
A music room in a stone farmhouse with a grand piano and clear windows looking onto snow.
The Numbers Don’t Agree
Wood flooring warranties are the most specific documents in the house on this. One engineered flooring warranty I found required the room to stay between 35 and 55 percent relative humidity year round, and a solid wood maker’s ran 35 to 60. Both excluded damage from humidity outside their range, so a floor that gaps after a dry winter may not be covered. The range for a specific floor sits in its own warranty, and the installer should confirm it in writing before installation.
Art asks for more. Chubb, which insures fine art collections, has advised display conditions around 45 percent at roughly 21°C. Steinway’s UK care guide gives a wider band, 45 to 70 percent at about 20°C. Solid wood furniture has its own tolerance, and a long heating season is when a finish starts to split where the joints meet.
Side by side, the floor’s upper limit of 55 sits just above the 45 that art and a piano both want at minimum. There is room to work.
What Indoor Humidity Is Best for Breathing?
Climate decides which way the system works hardest. A desert house in Scottsdale or a ski house in the Rockies spends much of the year adding moisture, and a house in Miami or Singapore spends it taking moisture out. Both directions matter to the people living there. The Mayo Clinic links dry indoor air to dry sinuses and nosebleeds and puts the ideal home range at 30 to 50 percent. On the humid side, the CDC’s asthma guidance recommends keeping indoor humidity around 30 to 50 percent to limit dust mites and mold.
Set beside the floors and the art, the health numbers mostly agree. A house held near 45 to 50 percent sits inside the health guidance and the collection guidance at once, which makes the number easier to defend to a client. The trouble starts outside.
How Humid Can a House Be in Winter?
Indoor moisture condenses first on the coldest surface in a room, and in winter that is the glass. Cardinal Glass, which makes insulating glass for window manufacturers, puts a comfortable average at 35 to 40 percent when it is 20°F or warmer outside, and points to ENERGY STAR’s advice of 30 to 40 percent in colder climates. A window company’s guide drops the ceiling to 30 percent once it falls to 0 to 10°F. Minnesota’s Center for Energy and Environment warns that in extreme cold, even 40 percent can condense on windows and wall surfaces.
That puts the art’s 45 percent out of reach on a January night in a snowy climate with ordinary windows. The same window guide notes that window type and air sealing both change how much humidity a house can hold before the glass fogs, since a warmer inner pane lets the room carry more moisture. The humidity a collector wants is partly a window specification. I’d put the question to the window supplier in writing, what indoor humidity will this glass hold without condensing on the coldest nights this house will see? A controller with an outdoor sensor can also lower the target as the weather turns colder and bring it back up on milder days.
The Water Decides Which Steam
Steam is the type built for tight control, and it has a second argument in its favor. The Mayo Clinic’s main warning about humidifiers is mist from a dirty unit carrying bacteria or mold into the room, and steam starts as boiling water, which is why makers such as Condair describe it as sterile.
It comes in two kinds. An electrode unit boils water by running current through it, so it depends on the minerals in the water to conduct. Humidifier maker steamOvap states that an electrode unit can’t run on reverse osmosis or deionized water for exactly that reason. A resistive unit heats the water with submerged elements, so mineral content doesn’t change its output. Condair says a resistive unit on reverse osmosis water can hold humidity within 1 point either way. It also lays out the tradeoff plainly, electrode units cost the least to buy, and resistive units cost the least over their working life once replacement cylinders and service are counted.
So the humidifier follows the water. Each manufacturer’s installation guide lists the water types a model accepts, and that list is worth checking against the house’s water treatment before anything is ordered. A house that already runs its water through reverse osmosis points toward resistive, and the steadier control is the reason a collector would pay for it regardless.
Where the Steam Comes Out
In a house with forced air, steam enters the supply duct through a dispersion tube and travels with the air. A house heated through radiant floors may have no ducts to carry it, so the steam has to enter the room directly. AprilAire sells a ductless version that pairs a steam unit mounted out of sight with a fan pack recessed into the wall. The room sees a grille rather than a cabinet. That grille is the one part of the system anyone will see. It deserves the attention of a switch plate, and it’s worth asking the manufacturer whether a custom grille in the room’s own metal finish will still let the fan pack do its job.
A penthouse hallway with a framed work and a slim grille set flush in the plaster wall.
Summer Is the Opposite Problem
An air conditioner dries the air as a side effect of cooling it, and only while it runs. Lennox notes that an oversized system can cool a room quickly and still leave the humidity behind. It reaches the thermostat setting and shuts off before it has pulled enough moisture out. Tight houses make this harder. Field Controls, which makes whole house dehumidifiers, points out that a tighter house holds on to its moisture, and that the air conditioning alone often can’t bring it down to target.
A whole house dehumidifier works independently of the cooling, and Lennox describes pairing one with a variable capacity air conditioner as one of the most efficient setups available. Before either goes on the drawings, the document to request is a written Manual J load calculation from the mechanical contractor, the sizing method published by ACCA, because the size of the air conditioner decides how much drying it does on its own.
The Most Fragile Thing Sets the Number
When the glass can’t carry the art’s number, the answer is usually smaller than the house. Steinway’s UK guide makes the same call for a single instrument, humidify the room around the piano rather than fit a unit inside it. Scaled up, that means a music room or gallery on its own zone, held at its number through January while the rest of the house drops to what the windows allow.
This is general information, not a mechanical design or medical advice. Equipment requirements and local codes vary, so confirm every figure with the manufacturer’s documentation and the project’s engineer, and take health questions to a physician.

Sourcing Tonalá Burnished Pottery
Tonalá’s burnished clay was served to a Spanish princess in Las Meninas. Today the town sells master work and market stock under one name, and the way to tell them apart is the maker’s record, not the shelf.
Tonalá burnished pottery, barro bruñido, is unglazed earthenware from Tonalá, Jalisco, rubbed with stone and then pyrite until the clay itself shines. It was a luxury in Europe long before it was a souvenir, and today the town sells two very different things under the same name, work from master workshops and market stock made to a price. What separates them is the maker, and a maker’s record can be checked.
Unglazed earthenware vessel from Tonalá, Jalisco, painted by hand.
A Water Jar for the Spanish Court
In the 1600s and 1700s, Tonalá water vessels called búcaros de Indias were among the most prized objects in elite European households. Collectors valued them for the aroma and taste the clay gave the water inside. The Denver Art Museum notes that some owners kept them in wooden boxes scented with spices and oils, so the absorbent clay would carry more fragrance. The clay was also thought to be medicinal, and fashionable women in Spain and Italy ate fragments of it, which the Metropolitan Museum of Art says left their complexions pale. In Velázquez’s Las Meninas, painted in 1656, the Infanta Margarita is offered a small búcaro of water on a silver tray. The V&A holds dimpled Tonalá vessels from that century and notes that potters in Tonalá still work in the búcaro tradition.
How Burnished Clay Is Made
The clay is dug from the hills around Tonalá, then ground, sifted, wetted and left covered for months to ferment, according to a profile of the Jimón family published by the Feria Maestros del Arte. Once a piece is shaped and dry, it is smoothed with stone. A slip seals the pores and lays down the background color, and the decoration is painted in clays mixed with earth pigments. The final shine most sources describe comes from a burnisher made of pyrite, a metallic mineral. Agustín Jimón Barba, whose family has worked clay for more than seven generations, finishes with tallow instead, by the fair’s account. The piece is then fired once in an open kiln.
Is Tonalá Pottery Glazed?
Burnished Tonalá ware has no glaze. The San Antonio Museum of Art’s label for a Tonalá vase from about 1930 says it plainly, the shine comes from rubbing the clay. Even dealers confuse the two. One vintage listing describes a duck’s “glossy glaze” and in the next lines presents it as typical of barro bruñido. A glaze is a layer of glass fused onto the surface. A burnished surface is the clay itself, polished. Because it stays slightly porous, most burnished work made today is decorative rather than functional, as Ceramics Monthly noted in its profile of two Tonalá potters. Before specifying a piece to hold water for flowers, ask the maker whether it will.
Reading the Ground Color
Burnished work in Tonalá runs in family lines, and the background color often points to one. A 2017 La Jornada column on an exhibition of Ángel Santos’s work named the grounds he had drawn on. Earthy orange went with Jorge Wilmot and Salvador Vázquez Carmona, and gray with the Galván and Jimón families. The Mateos Ortega family worked in black sgraffito. The gray line has carried on, Guadalajara’s Museo de Artes Populares gave the Jimón López family a show of burnished and bandera clay in 2026. Bandera and canelo are burnished too, each with its own look. Bandera paints white and green over a red ground, the colors of the flag, and canelo fires to shades of cinnamon. A seller should be able to tell you which clay a piece is.

Pyrite, stones and fine sand in clay bowls on a workshop table.
Tonalá Pottery Signatures and Prize Records
Vintage dealers often identify Tonalá pieces by a mark on the base, sometimes a family name, sometimes initials. A signature tells you whose work to ask about. On its own it proves little. The stronger record is the Premio Nacional de la Cerámica, Mexico’s national ceramics competition, seated in Tlaquepaque in the Guadalajara metropolitan area. Its traditional ceramics category names burnishing among the techniques it judges, and its top prize is presented by the president of Mexico. Vázquez Carmona won the presidential award in 1999, and Santos won it in 2014. Ask whether a maker has placed there, and in what year. That question separates a workshop from a stall better than anything you can see on a shelf.
Fewer Hands Burnish It Now
The craft Spanish collectors once paid for has been shrinking. In 2016, Tonalá potters speaking at the University of Guadalajara said the number of burnished clay artisans in the town center had fallen to about 100, from hundreds in the 1970s, and that new housing was covering the clay deposits. In 2024, a Santa Fe museum shop described the technique as made by only a few artisans in Tonalá. The vice president of retail for the foundation behind that shop has said vintage Tonalá turns up in the US, while new work rarely does. Two routes lead to it. The juried Feria Maestros del Arte near Lake Chapala, where Tonalá potters including members of the Jimón family have exhibited, has offered packing and international shipping on site. The other route is the workshops themselves in Tonalá, found through the prize records above. If you make burnished work in Tonalá and want designers to find you, I’d like to hear from you.

Soft Quartzite Is Marble
A slab sold as soft quartzite is marble, usually dolomitic marble. How to sort quartzite from marble and sandstone at the yard with a glass tile and a drop of acid, and what to check on the test data.
Soft quartzite is a name stone yards give to marble, most often dolomitic marble, when it’s sold as the harder stone. The Natural Stone Institute’s quartzite bulletin rejects the term outright, there is only one kind of quartzite, hard and resistant to etching. A slab yard can carry three different rocks under the word quartzite, and only one of them is quartzite. That matters because a client rarely picks quartzite for its looks alone. They pick it to get marble’s veining without marble’s reaction to a squeeze of lime. If the slab turns out to be marble, the client paid for a promise the stone never made.
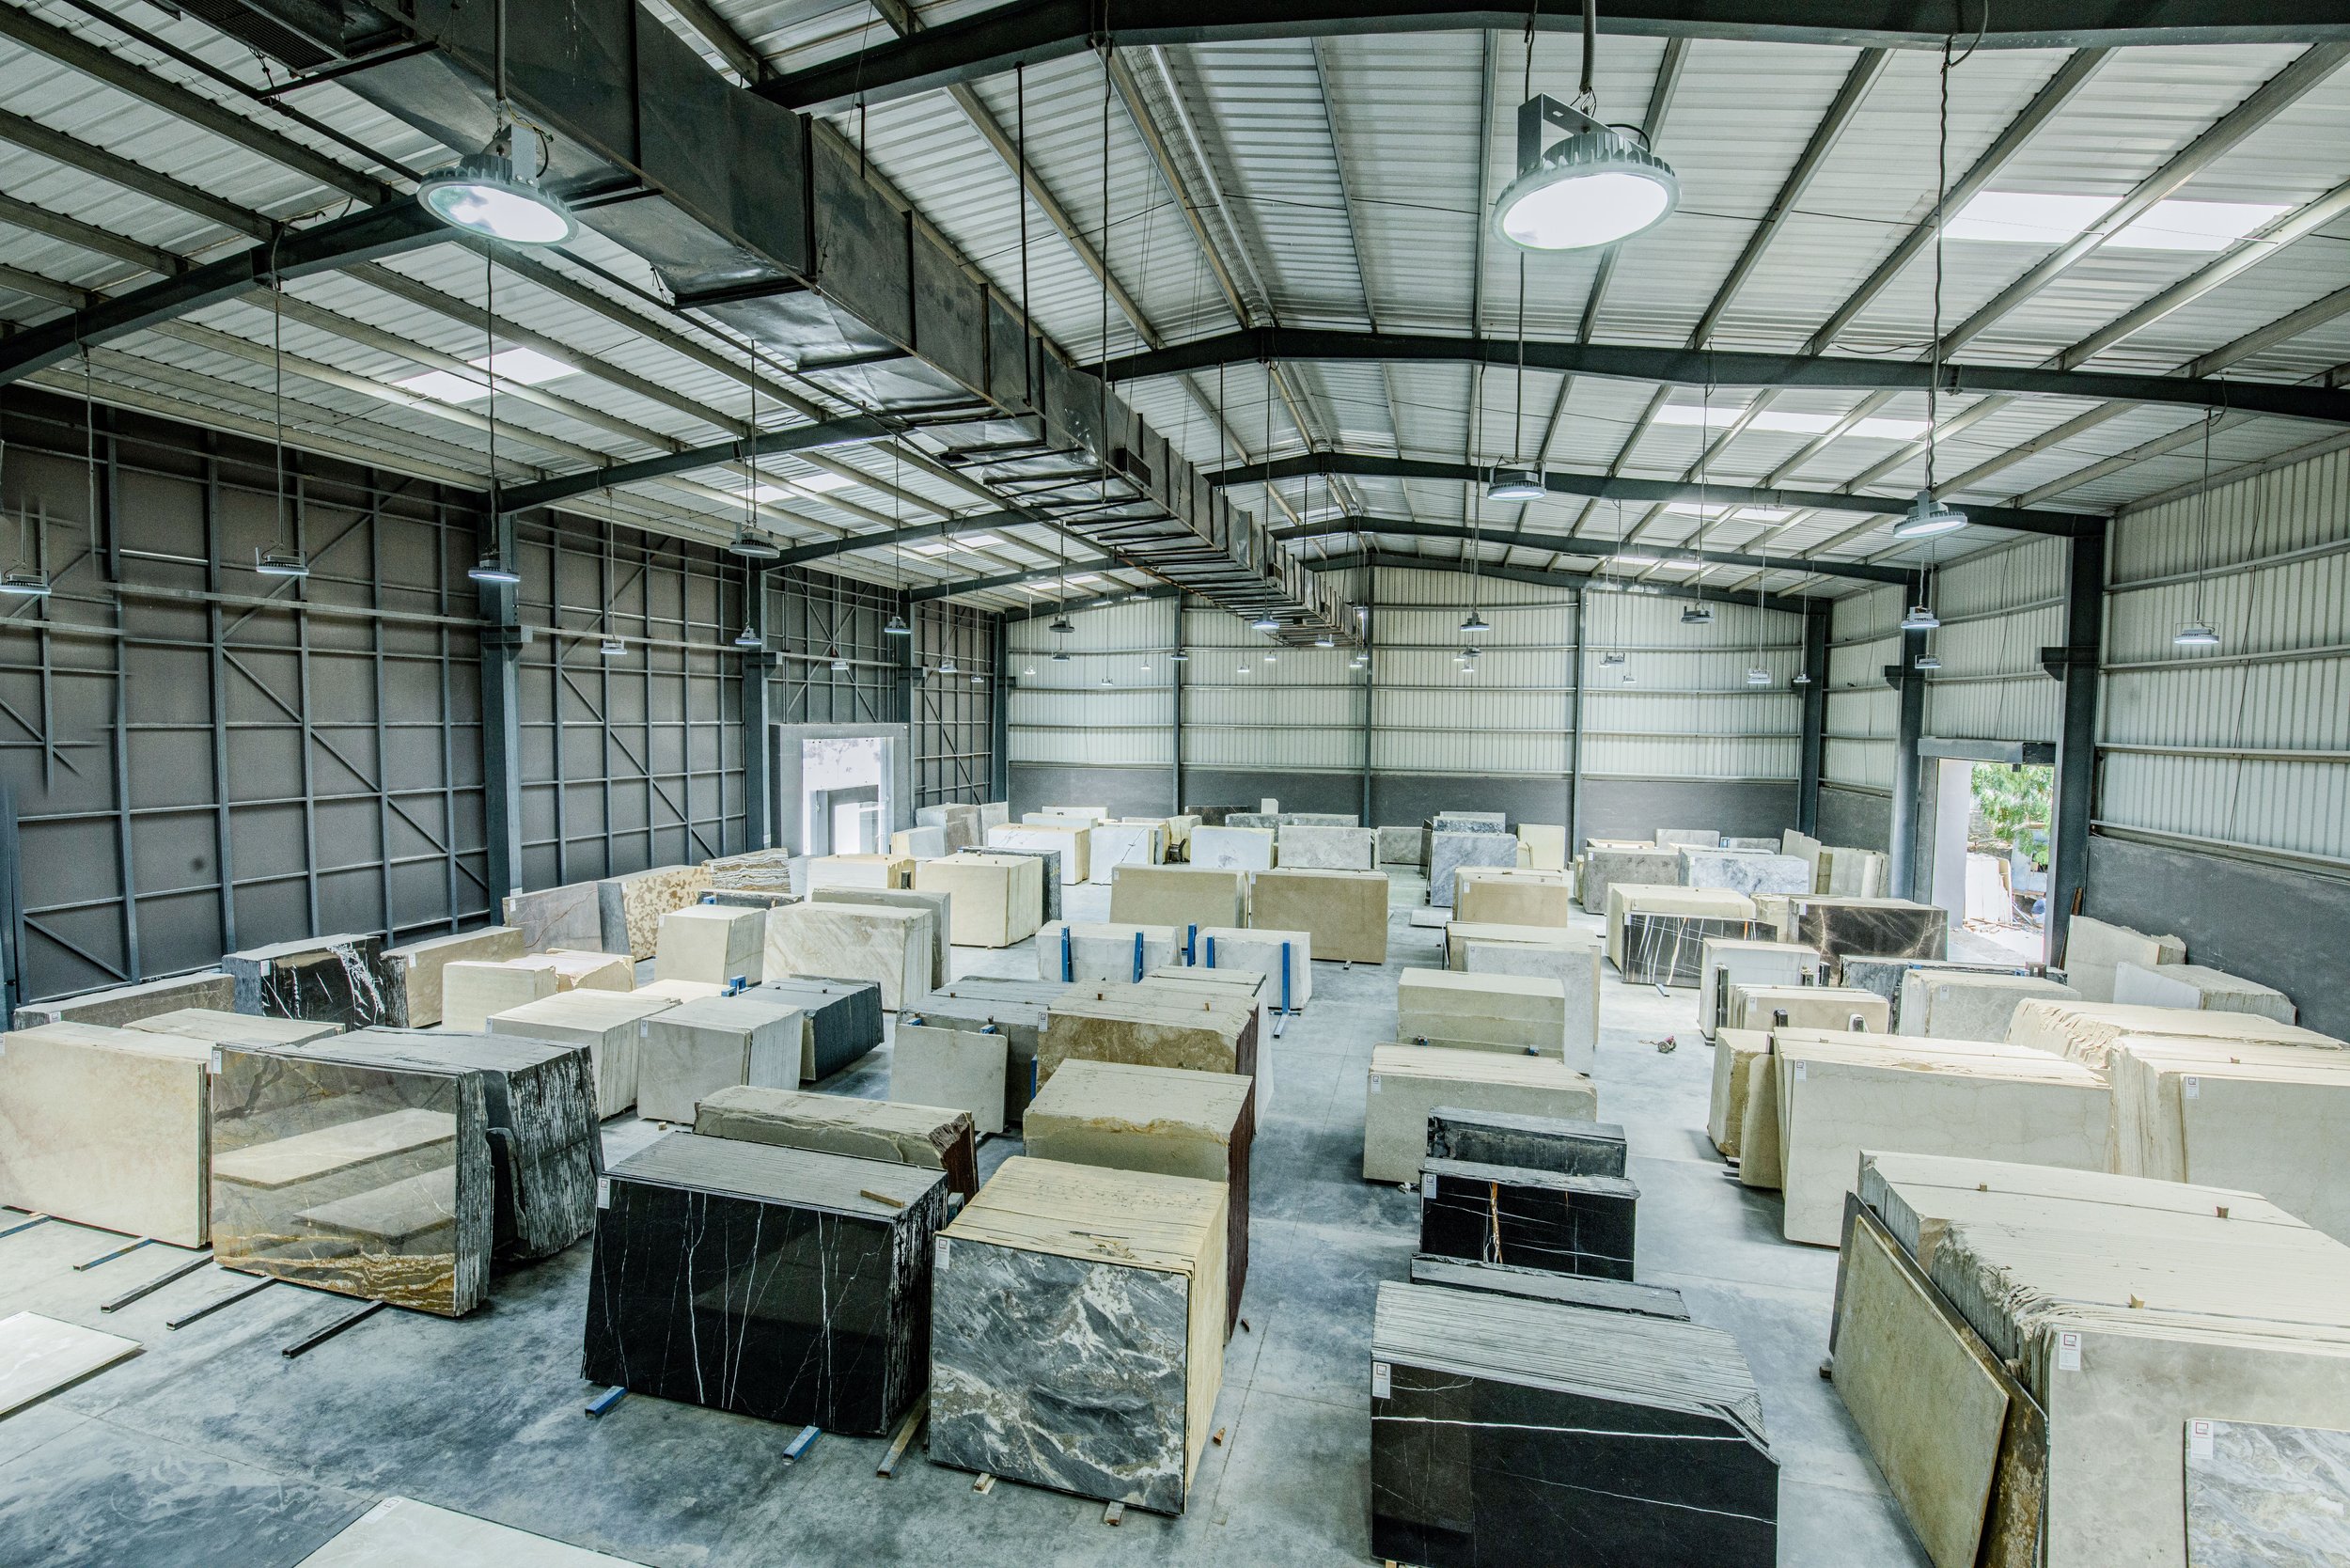
Stone yard warehouse.
Why the Name Slipped
Geologist Karin Kirk, who wrote that bulletin, named Super White and Fantasy Brown in a 2018 Building Stone Magazine article as marbles that had been widely sold as quartzite. Many dealers had started relabeling them. The trade’s habit of giving stones its own house names still made any single stone hard to track.
The confusion runs in both directions. At a 2022 stone industry session, Buddy Ontra, then president of the Natural Stone Institute, recalled being told the first Taj Mahal he cut, around 2009, was granite. Taj Mahal is real quartzite. The same discussion turned up Shadow Storm and Carrara Quartzite, sold under the quartzite name in one participant’s area, as Brazilian marbles.
The two rocks come by their resemblance honestly. Quartzite begins as sandstone, buried and heated until the sand grains recrystallize into one solid mass of quartz. Marble forms the same way from limestone or dolostone, so it stays calcite or dolomite. Even a trained eye can’t sort them, in Kirk’s view.
How Do You Tell Quartzite From Marble?
Hardness answers it. Quartz sits around 7 on the Mohs scale and glass around 5.5. The Kansas Geological Survey puts calcite at 3 and dolomite at 3.5 to 4. So quartzite scratches glass and marble cannot.
The method Kirk teaches starts with a glass tile laid flat on a table, never held in your palm. Take a sharp raw edge of the stone with no epoxy on it and press with your weight behind it. Real quartzite bites, loud enough to hear, and the scratch won’t rub off. Marble glides across, or leaves a line that rubs away. Try a second spot, since some marbles hold small pockets of quartz that can fool one pass.
With no offcut available, a knife tip on the slab edge does the same job, with the yard’s permission. Marble takes an obvious scratch. Quartzite takes nothing a fingernail can catch.
Dolomite Needs a Second Drop
The acid test confirms what the glass found. The standard is a single drop of 10 percent hydrochloric acid on unsealed stone. Calcite marble fizzes, which is the stone dissolving. Quartzite does nothing at all.
Dolomitic marble can sit there looking innocent. Scrape a little powder loose with the knife tip and put the drop on the powder instead, and dolomite gives itself away with small bubbles. Quartzite barely gives up any powder to test. Lemon juice or vinegar works as a slow version. Leave it at least 15 minutes, then look for a dull patch, or one that reads lighter or darker than the stone around it.
None of this makes dolomite a bad stone. It etches more slowly than calcite marble, which gives a client a short window to catch a spill. It just isn’t quartzite, and it shouldn’t be priced or promised as one.
Sandstone Is the Smaller Mistake
Sandstone sold as quartzite is a milder error, because both are mostly quartz and behave much alike. Porosity is the real difference, and porosity decides staining. Metamorphism comes in grades, so quartzites run along a continuum. Kirk put White Macaubas close to sandstone in porosity and Taj Mahal at the dense end, and some quartzites absorb more than some sandstones. ASTM C616, the specification for quartz based dimension stone, draws its lines by free silica content, with sandstone, quartzitic sandstone, and quartzite as Classes I, II and III.
A stone that passes the glass test can still drink red wine. A few drops of water on an unsealed sample show how fast it absorbs. Sealing is its own subject, covered in A Stone Sealer Stops Stains, Not Etching.
Wet bar in a paneled library with a white veined stone counter and backsplash.
The Shop Cutting It Reads the Label Too
The label matters past the client’s counter. A California workplace safety evaluation in April 2026 listed natural quartzite at more than 90 percent crystalline silica, against 10 to 45 percent for granite and under 5 percent for marble. Engineered quartz, the material behind California’s countertop silicosis cases, typically runs above 90 percent too, according to state public health researchers. A slab drifting between the words marble and quartzite tells a fabrication shop the wrong thing about the dust it is about to make.
Three Years Is the Shelf Life of a Test
A yard name and a price tag settle nothing about what a slab is. Reliable stone companies keep physical property test data on their stones, and ASTM’s guide on stone test sampling recommended that the data come from the previous three years. Kirk added that a shift in the quarry face calls for fresh testing. The two people worth working with are an importer who can hand over current lab data, and a fabricator willing to run the glass and acid tests on an offcut before anyone templates the slab. I’d ask to see the date on that data sheet before I’d ask the stone’s name.
Not All Shou Sugi Ban Is Yakisugi
Yakisugi is Japanese cedar charred on purpose, and a lot of what’s sold as shou sugi ban is a different board. How to specify the species and the finish, and which fire report to ask for.
Yakisugi is Japanese cedar charred on purpose, and shou sugi ban started as a misreading of its name. The old way to make it needs three boards and a ball of paper. The boards are tied into a triangular chimney with the paper lit at the bottom. The draft pulls fire up the inside faces until they turn to charcoal, and then the chimney is tipped over to stop the burn. Takeshi Hayatsu, an architect from Okayama, has described it as an inexpensive way to clad the backs and sides of buildings, and named his home region as the place it’s used most. In North America it became a premium facade.
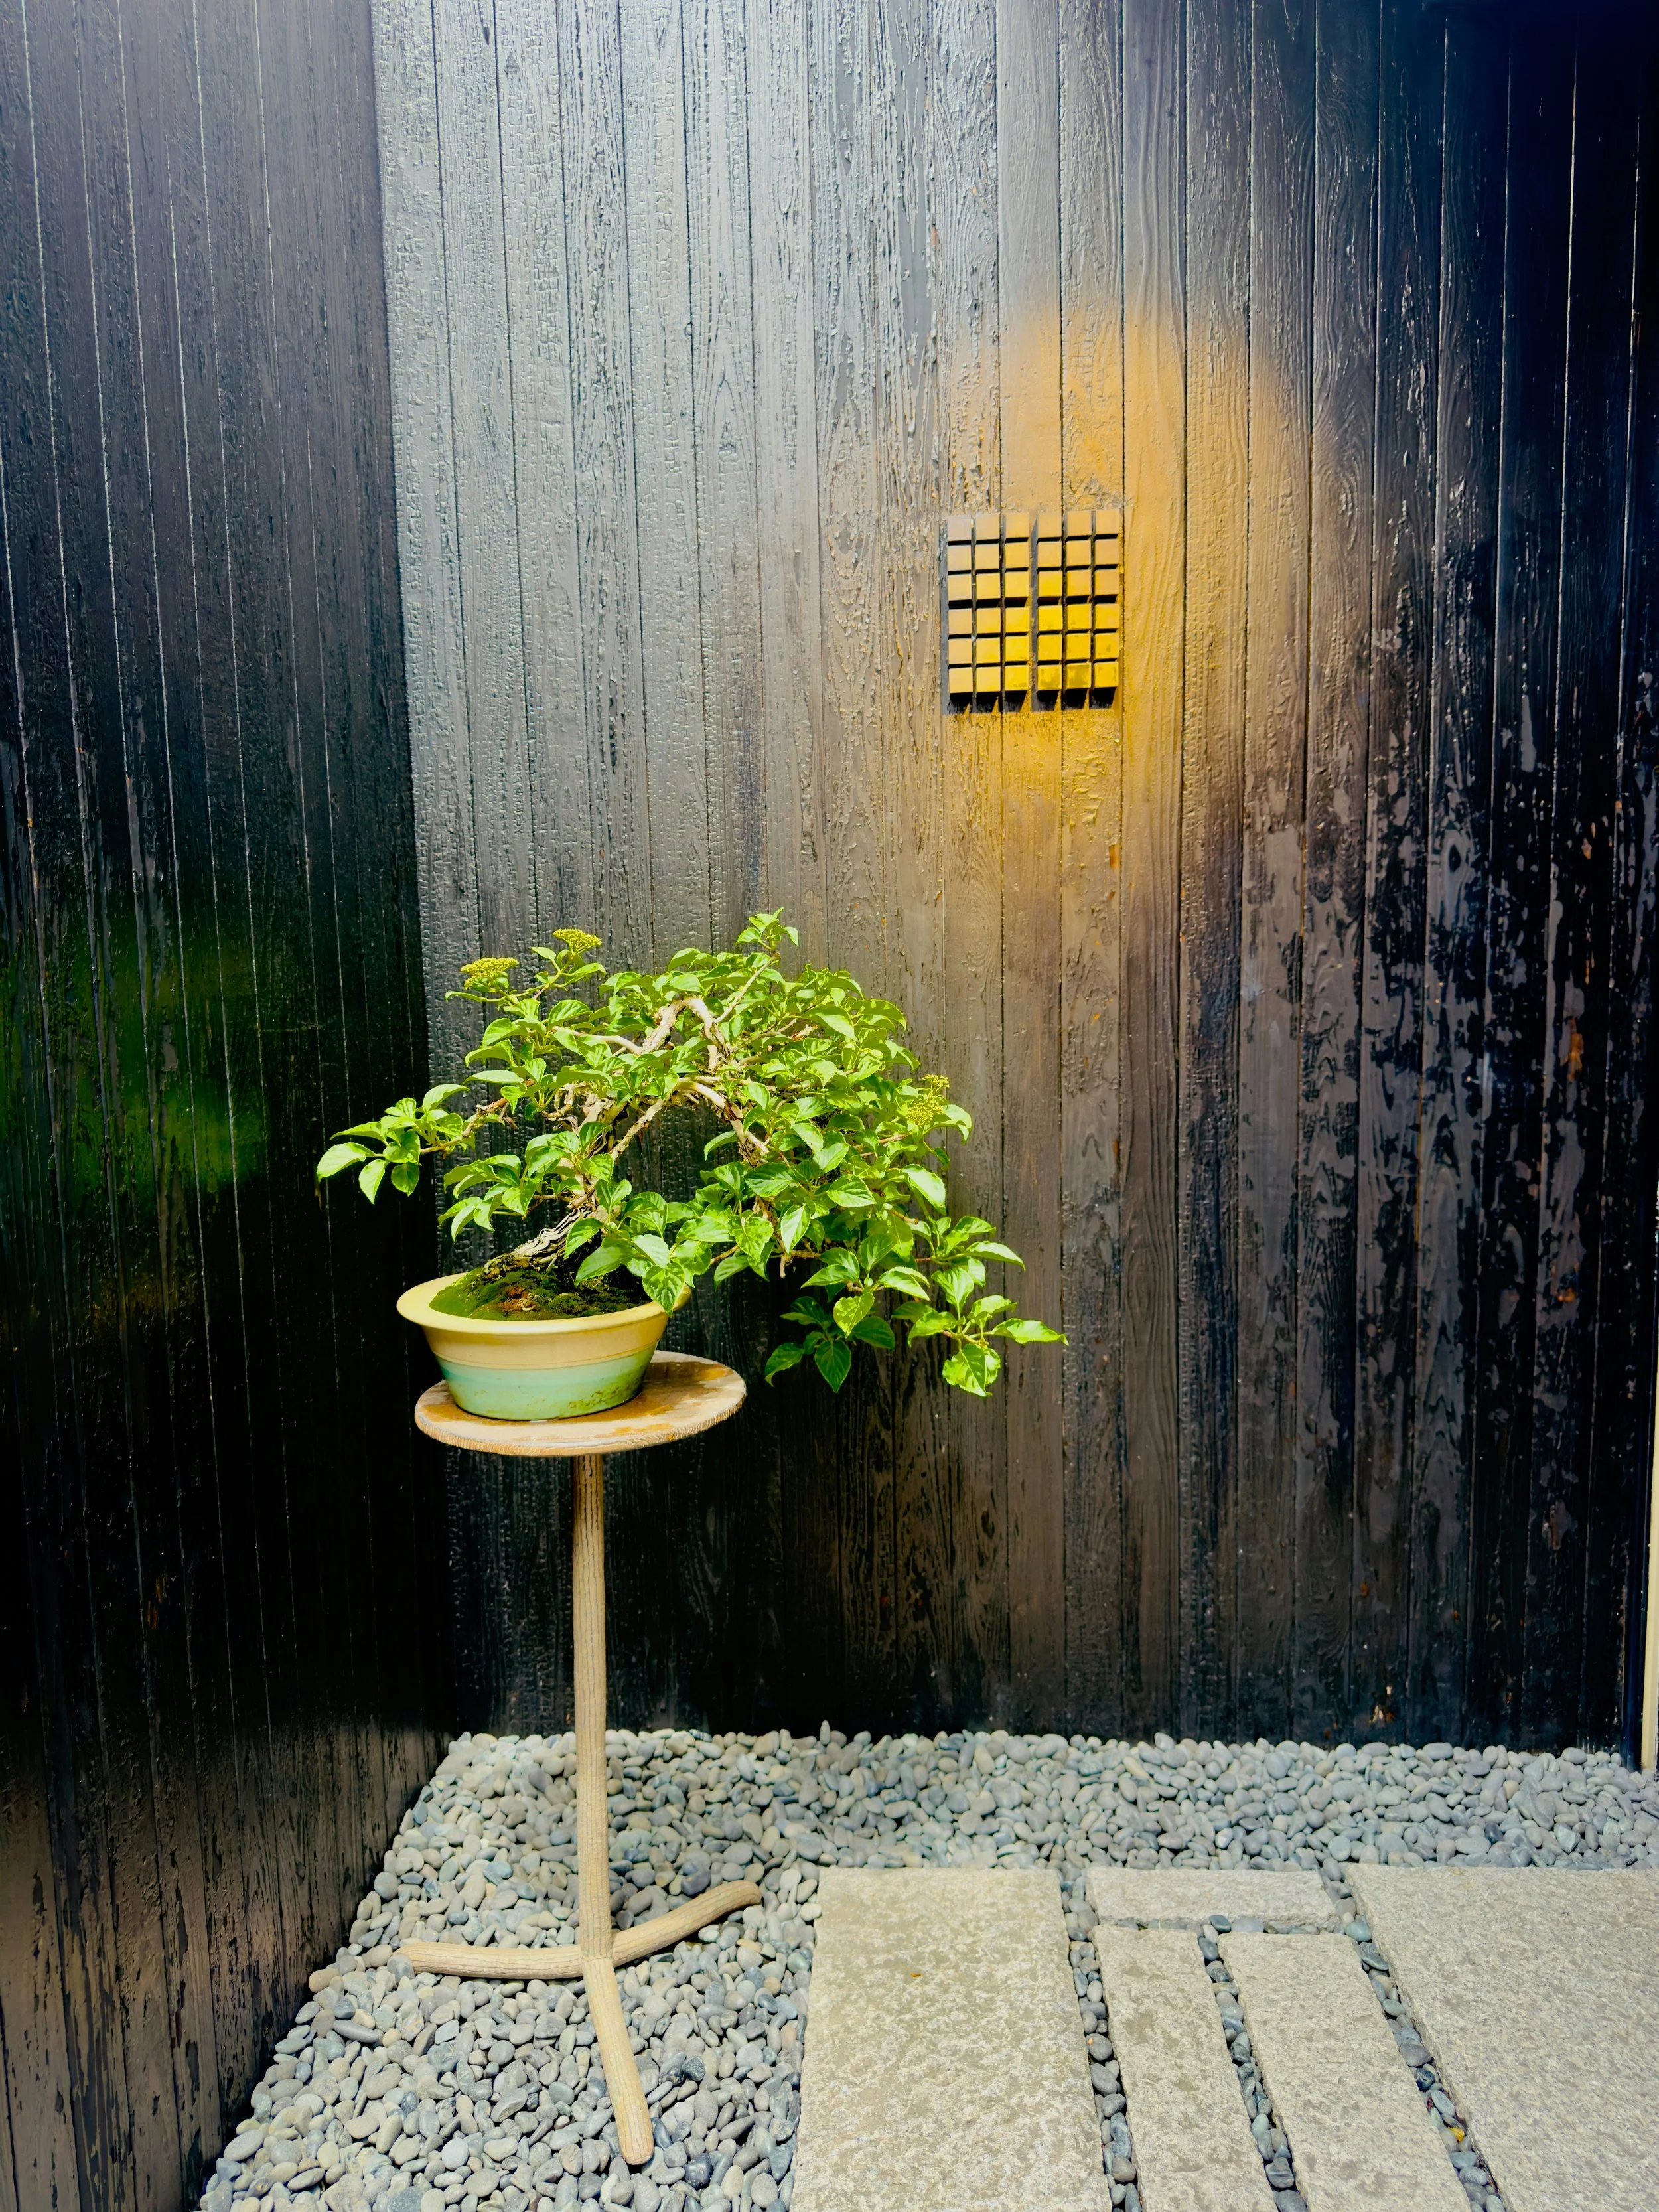
Charred wood cladding.
Shou Sugi Ban Is a Misreading
The word is 焼杉: yaki, burned, and sugi, the Japanese name for Cryptomeria japonica, the conifer the West calls Japanese cedar. The Western name came from reading the longer form, yakisugi ita, with Chinese pronunciations mixed in. Ban is the Chinese reading of the character for board. Nakamoto Forestry, a Japanese producer that spent years correcting the term, eventually started using both names on its own site, because the wrong one drew nearly ten times the audience.
Use whichever word gets the conversation started. The trouble is what the label lets through. ArchEyes traced how “shou sugi ban” became a catch all for any charred wood, whatever the species. It also pointed out that a spec using the term can come back as authentic sugi or a Western cedar board torched by machine, with paperwork that looks the same.
Name the Species on the Drawings
Even the purists draw the line in different places. Popular Woodworking holds that only charred sugi can be called yakisugi. McIlvain, a lumber distributor, counts Japanese cypress as well, and notes that some sellers burn other species and label them shou sugi ban anyway. According to Architizer, Delta Millworks, a charred wood maker, once steered the architects of a house away from its own charred Southern cypress toward charred Accoya, an acetylated radiata pine from New Zealand, for its finish and durability.
None of these is a fake. Each is a different board with different behavior. If a client wants the Japanese material, I’d write Cryptomeria japonica on the spec and let the trade name follow.
How Deep the Char Goes
Speed is where the char gets thin. In a 2022 study published in BioResources, researchers replaced the paper ball with a gas burner to improve the industrial process. The char came out thinner than the traditional method produced, and they put that down to a shorter burn. ArchEyes, in a feature built around a Japanese producer, gave traditional three board sugi a carbon layer of 3 to 10 millimeters depending on finish, against 1 to 2 millimeters for boards passed through a flame on a conveyor. Ask the supplier how the boards were burned and how deep the char runs.
Fire also cups the board. Terunobu Fujimori, the architect and historian whose trademark materials include yakisugi, used cedar charred in eight meter lengths on Yakisugi House in Nagano. The boards warped, and he filled the gaps with plaster. The black and white stripes on that facade started as a fix.
Brushed Once, Brushed Twice
Unbrushed char keeps its full scaly surface, and Nakamoto’s own spec sheet called its unbrushed, unoiled board very delicate and said it would blemish. One pass of the wire brush takes off loose soot and leaves a subtler texture. As the Woodworkers Institute describes it, a second pass strips the soft spring growth bare and leaves the harder late growth as dark ridges. Oil changes the surface again, Nakamoto described tung oil turning unbrushed char leathery and slowing how fast the soot wears away.
Inside a house, bare char rubs off on hands and clothes, so interior boards get sealed. Nakamoto sold a tung oil prefinish for exterior use only and a polyurethane prefinish for interior use. Its finish names, Suyaki and Gendai, carry its registered trademark, and another maker’s board won’t use either one. Write the finish out instead, by the number of brushing passes and whether the board is oiled.
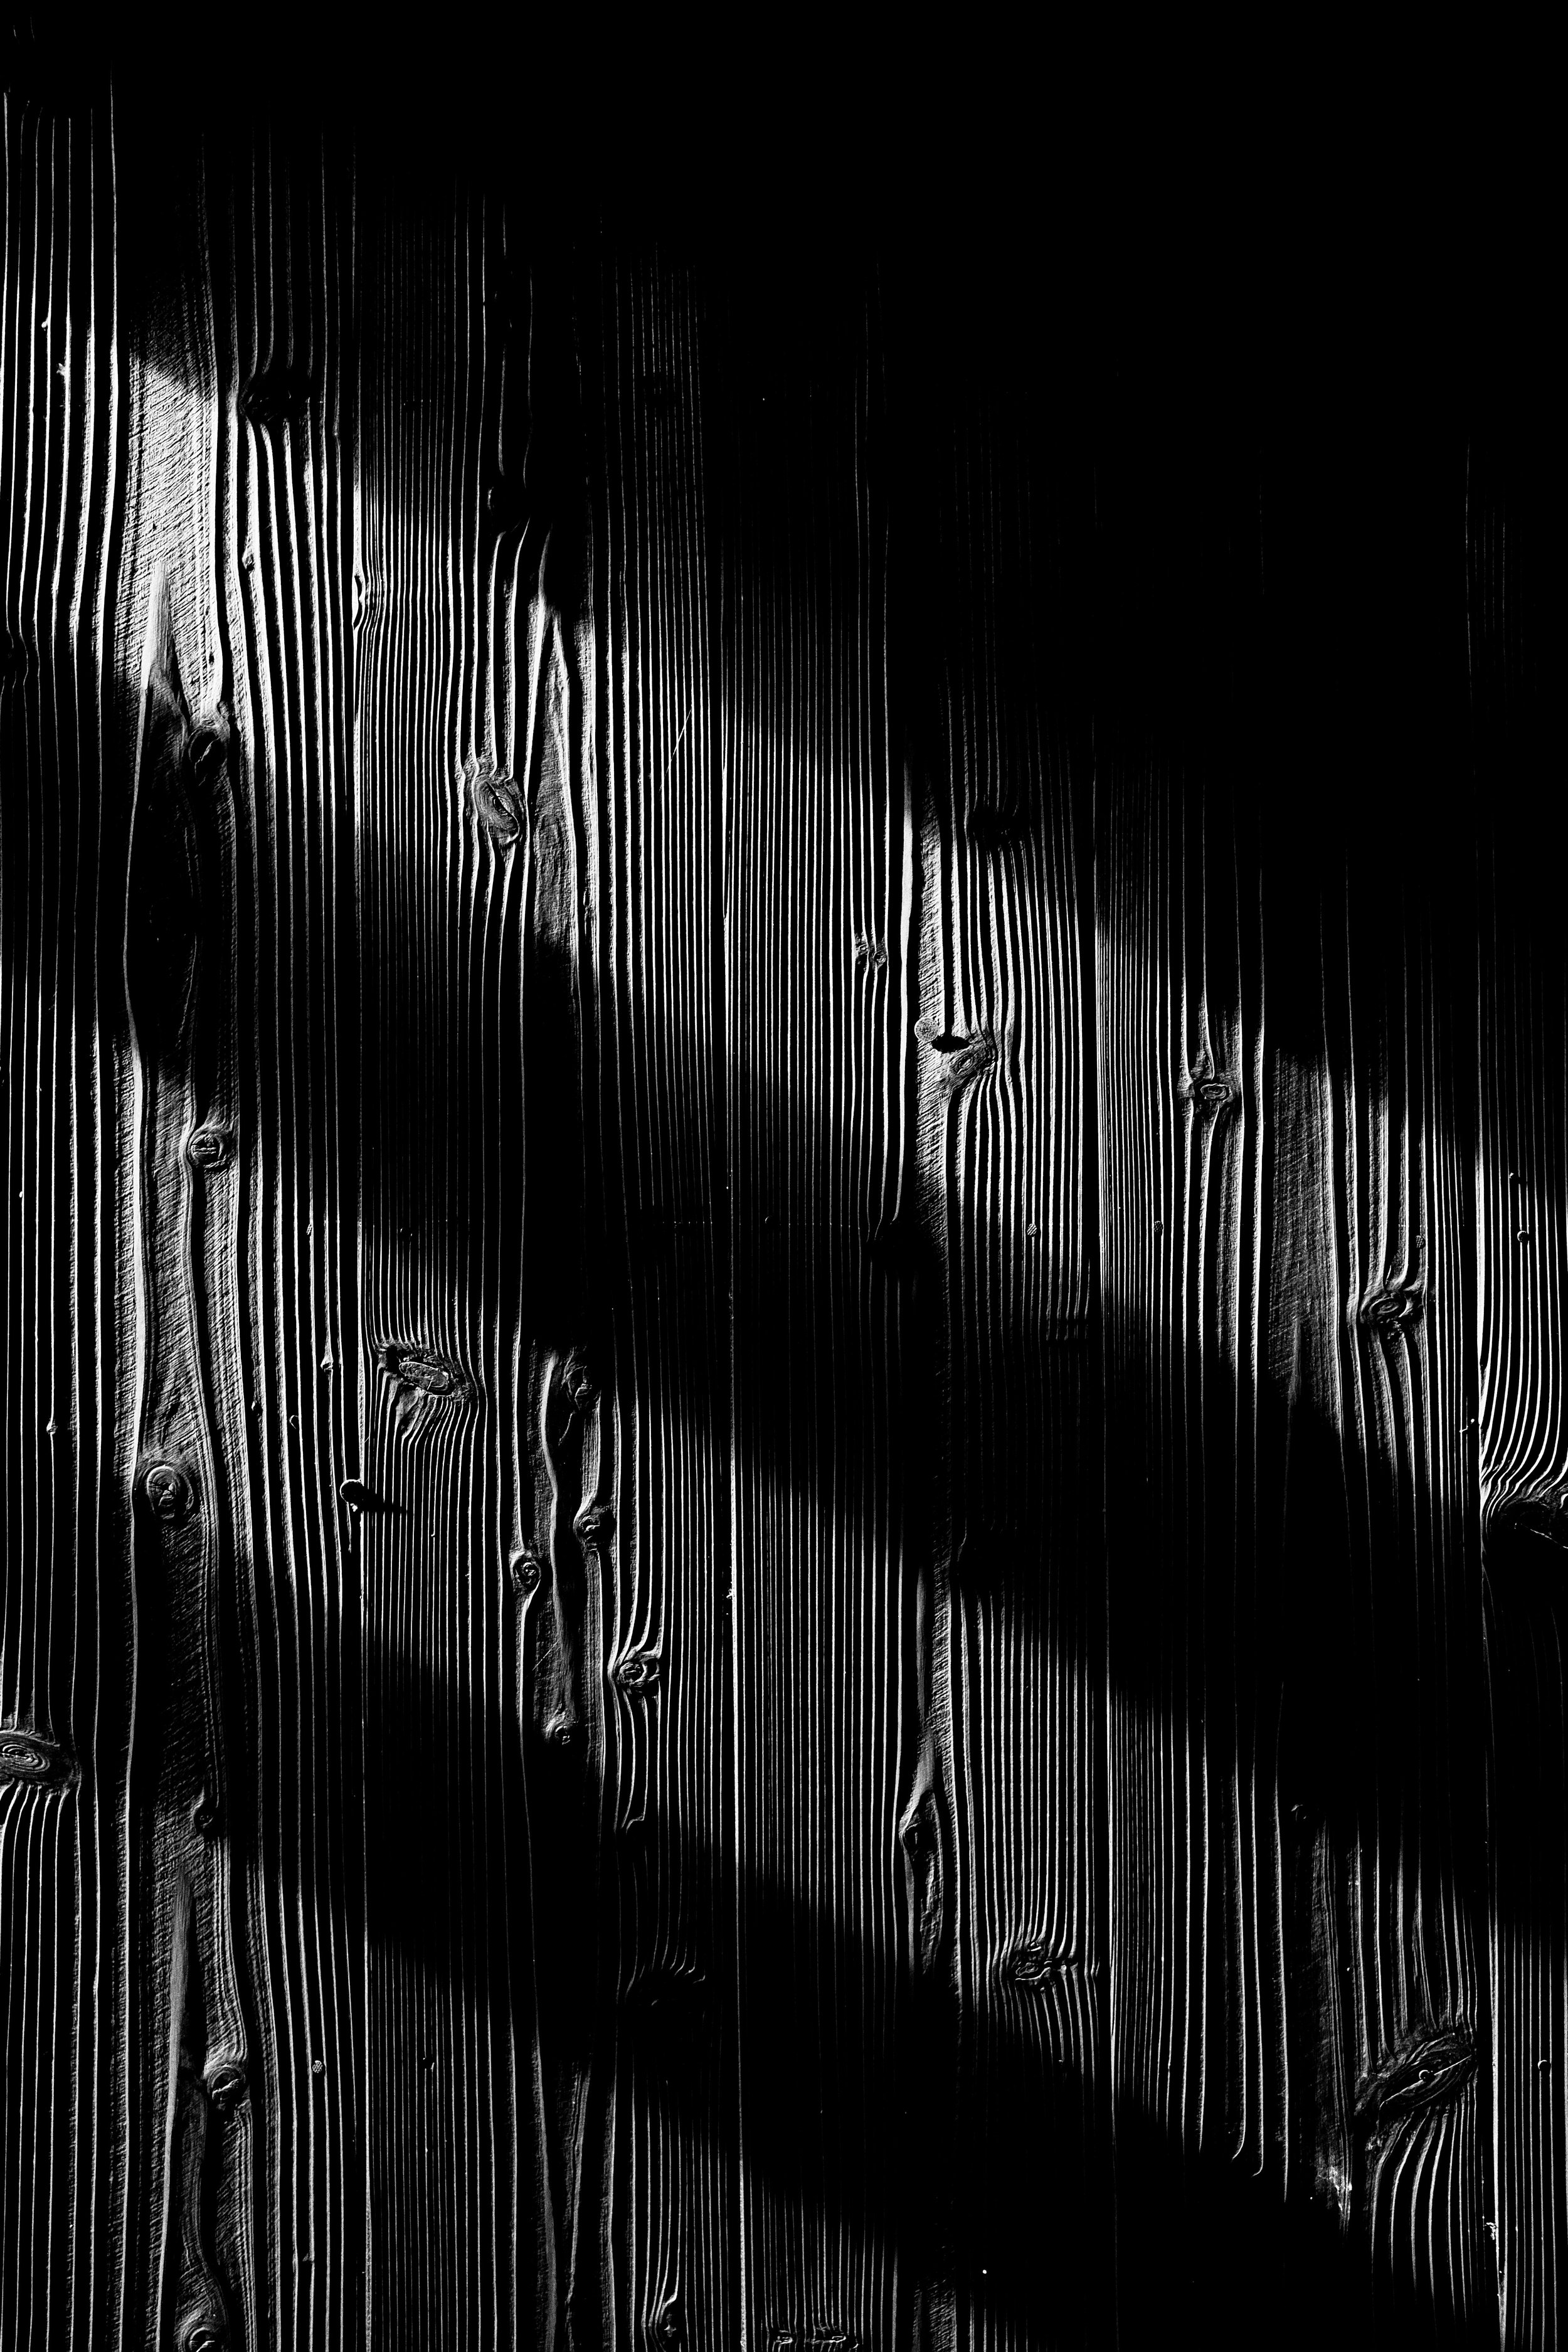
Close view of charred wood.
Is Shou Sugi Ban Fire Resistant?
The char helps. McIlvain explains that the surface layer has already given off the gases that feed ignition. A rating still belongs to one product in one finish. When I checked, Nakamoto’s fire table listed its unbrushed line as Class A, B, or C under ASTM E84, depending on finish. McIlvain, which carries charred modified woods, reported Class A for charred thermally modified ash and for charred Accoya, against Class C for uncharred cedar. Nakamoto also noted that in high fire zones, compliance usually comes from a tested wall assembly, not from the siding alone.
For a project in a wildfire zone, ask for the test report on the exact finish being specified, plus the assembly listing that covers the wall.
Four Lines on the Spec Sheet
A yakisugi spec that works names four things. The species, by its botanical name. The burn, with its method and depth. The finish, by brushing passes and oil, sealed if it’s going indoors. And the fire report for that exact finish, with the assembly listing if the site needs one. For the Japanese material, a producer with a North American warehouse is the direct route. For another species, a domestic shop that burns its own boards can answer all four lines just as well, and the drawings should say which board was chosen.

Leather on Walls and Furniture
Leather walls are older than printed wallpaper, and the hide behind them comes from cattle raised for food. How leather wall panels and wrapped furniture are made, rated for fire and sun, and sourced.
A leather wall today is usually built from tiles or panels of real hide, flat or padded, glued or clipped to the wall. Spinneybeck, a leather house just outside Buffalo, New York, makes its wall tiles from full grain, vegetable tanned belting leather about three millimeters thick. The same hides go onto furniture, wrapped around a wood or steel frame and stitched by hand.

Flat ink blue leather wall panels in a dressing room, afternoon light falling across the seams.
Older Than Printed Wallpaper
Spain had leather walls long before printed wallpaper. The craft came from North Africa, and its Spanish name, guadamecí, points back to the Libyan town of Ghadames. Córdoba made it under Moorish rule, and by 1569 Venice had given its leatherworkers guild status inside the painters’ guild. The panels were embossed and silvered, sometimes painted. The antiques trade notes that the gold on old Spanish leather was usually silver leaf under a yellow varnish, since gold leaf was never laid on leather. Printed wallpaper arrived from around 1650 and undercut it on price, and leather walls held on mostly in very grand houses. In 2020, Arab News described José Carlos Villarejo García as the last artist working Córdoba’s Umayyad guadamecí technique, in a museum he founded there in 2006.
Some makers lay leather on floors too. Alma in London has made leather floor tiles, and Cuir au Carré has paired calf leather walls with buffalo leather floors. Freund, a leather surface maker, has marketed leather floors and ceilings to designer hotels.
Are Leather Wall Panels Fire Rated?
In commercial interiors, wall panels are tested under ASTM E84, the standard that measures how fast flame spreads across a surface. Class A is the top result. The rating can change from one leather to the next, even inside one supplier’s range. Garrett Leather, a US supplier, published Class A ratings for some of its leather lines and Class B for others, and asked designers to name the rating when they ordered. Where a rating matters, ask for the test report tied to the exact leather and color going on the wall.
Sunlight Changes a Leather Wall
A wall sits in the light all day, which a chair rarely does. Fritz Hansen’s care guide notes that dyed aniline leather fades in sunlight while natural, undyed aniline darkens. The European guide for upholstery leather, EN 13336, recommends a lightfastness of at least 3 on the blue wool scale for aniline, 4 for semi aniline, and 5 for pigmented leather. Supplier spec sheets often list that number. For a sunny wall, I’d ask for it before I’d ask for the color name.
Furniture Wrapped by a Saddler
Furniture Wrapped by a Saddler
Wrapping furniture in leather is closer to tailoring than to upholstery. Soane Britain has its leather pieces made by a traditional saddler in Suffolk, who chooses the hides for each design and wraps the wood or metal frame himself. He stitches the seams by hand and burnishes the edges. The pairing of designer and craftsman goes back at least to Jean-Michel Frank, who worked with the cabinetmaker Adolphe Chanaux from 1929. Their desk from around 1930 has a leather top and drawers covered in leather on a lacquered steel frame. A wrapped piece needs both trades, someone who builds the frame and someone who knows hide.
Start With the Hide
For a wall, the path runs through a leather house with an architectural line, one that sells panels by the square foot and can send the fire report along with the sample. For a wrapped desk or bed, it runs through a cabinetmaker who works with a saddler, and the saddler should see the hide before anyone cuts it. Either way, ask where the hides come from. Cattle hide is a byproduct of beef and dairy, historically worth 6 to 8 percent of the animal’s value by the US leather trade council’s figures. A supplier who can name the tannery and the country of origin knows the material all the way back.
Where Whole House Backup Power Goes
Where the generator and the batteries go on a large custom house, including the propane tank on rural sites, and why whole house backup is really a load plan.
Whole house backup power is a generator or a battery system sized and wired so the entire home keeps running when the grid goes down. On a large custom house, the hard part is placement. The generator needs a clear zone around it, and the batteries have capacity limits tied to the room they sit in. Both need a place on the drawings before the service yard and the garage are fixed.
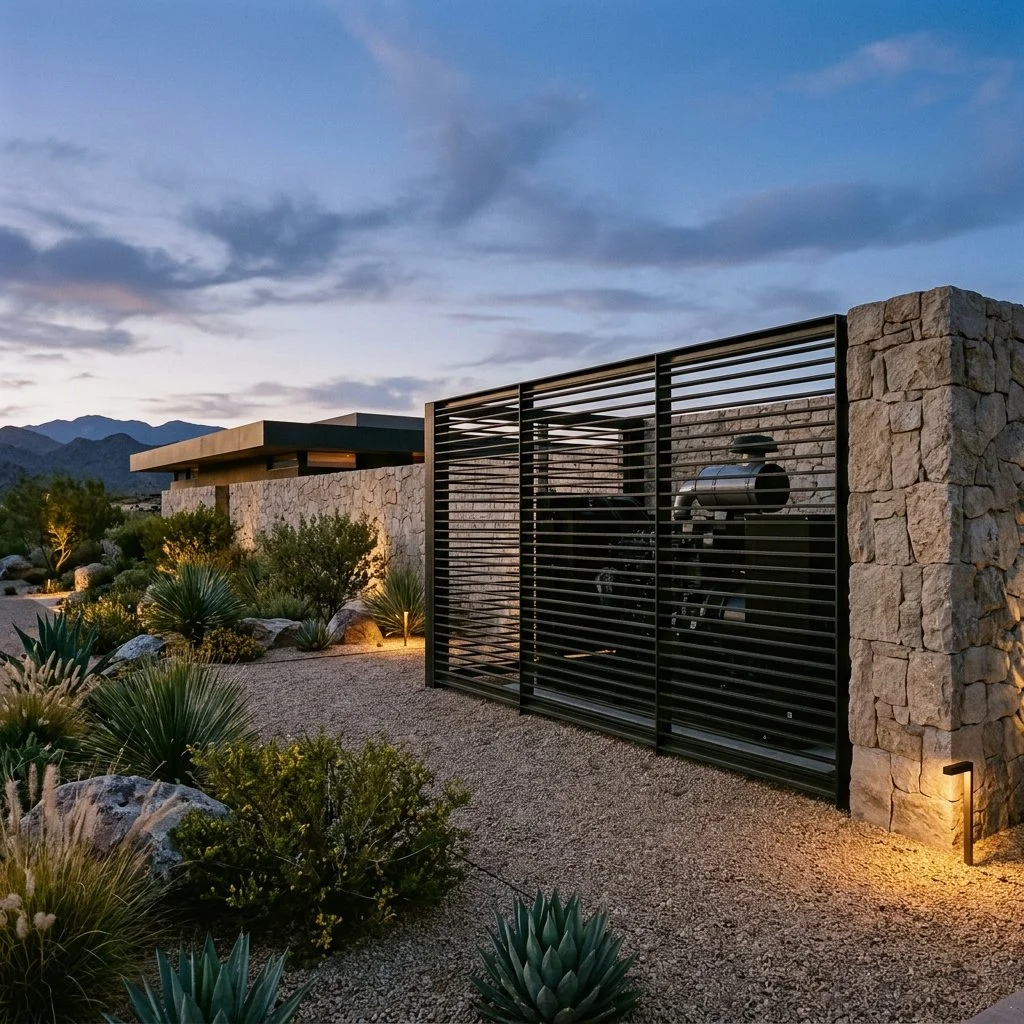
Standby generator behind an open steel screen in a stone service court at dusk.
How Far Does a Generator Have to Be From a Window?
NFPA 37, the fire standard for stationary engines, keeps a standby generator at least 5 feet from any opening in the building. Manufacturers read that broadly. Fixed windows are included alongside operable ones, and so are doors, soffit vents, fresh air intakes and window wells. A sealed window makes the list because exhaust can be drawn in through the gaps around its frame.
The unit itself can sit as close as 18 inches to a wall only if that model has been fire tested for close placement. Generac asks for 3 feet of open space at the front and both ends, and manufacturers rule out placing one under a deck. On a rear elevation lined with glass, that 5 foot zone leaves very few legal spots. Drawing the circle on the site plan early is how you find one.
The Screen Has to Let Air Through
Some towns require a generator to be hidden from the street and the neighbors. One New Jersey borough’s ordinance calls for plantings or an opaque fence tall enough to block it completely. The equipment wants the opposite. A Louisiana fencing contractor puts it plainly, a decorative screen has to stay outside the clearances in the installation manual, and a screen with several solid sides can turn into a partly enclosed box. Briggs & Stratton also asks that planting taller than a foot stay back from the unit.
This is where a metal fabricator or a good carpenter earns the job. Open slats or ornamental iron can block the view and still let air move, as long as the screen is laid out from the manual’s dimensions rather than the edge of the patio.
How Much Battery Can a House Hold?
More than most designers assume, but only in certain places. In its 2020 and 2023 editions, NFPA 855, the installation standard for stationary batteries, caps residential capacity by location. No single unit can exceed 20 kWh. Location sets the total: 40 kWh in a utility closet or storage room, and double that in a garage or outdoors. One Florida solar design firm reads the code as applying those limits per location rather than per house, so a home with two separate garages could hold 80 kWh in each. I’d want the local fire marshal to confirm that reading before anyone plans around it.
For a big house, that makes the battery wall a real piece of the garage plan, with its own space and whatever fire protection the local code requires, drawn in from the start.

Battery units spaced apart on a plastered garage wall.
Whole House Is a Load Plan
The National Electrical Code requires an automatic backup system to carry everything it switches over, unless a listed energy management system controls what connects. The 2026 edition goes further and recognizes these power control systems as a proper way to size backup without the oversizing older calculations produced. In practice, a smart panel or the battery’s own controller drops lower priority circuits when demand climbs. A modest system can then serve every circuit in the house, just not all at once.
Motors are the stress test. A well pump or a conventional air conditioning compressor pulls a burst of current at startup, several times its running draw. The same Florida firm notes that newer batteries handle that surge far better than early ones did, and that a variable speed compressor starts at a small fraction of a conventional one’s draw. If the property relies on a well, the pump and the battery should be chosen together.
Many large homes now pair the two sources. Batteries make the instant switch that keeps the network and the lighting scenes from blinking, and a generator carries an outage that lasts for days. On properties beyond the gas main, that generator runs on propane, which puts a tank on the site plan. NFPA 58 sets its distance from the house by size and by whether it’s buried, and a tank above ground holding more than 1,200 gallons sits at least 25 feet from the house and the property line. The tank’s size also sets how many days the generator can run between deliveries. A home with no utility connection at all is a different design, where the generator becomes a primary source rather than a backup.
Solar panels can recharge the batteries in between, but only if the system is set up to keep running when the grid is down. A standard grid tied array shuts itself off within seconds of an outage, a safety rule written into the inverter standards, and a cloudy week still leaves the generator doing the heavy work. An electric car can join in, but only with a bidirectional charger and proper transfer equipment. A 120 volt outlet in the cargo bed won’t run a house.
Decide What Goes Dark First
Every system that sheds load needs a load priority list, a ranking of which circuits stay on as demand climbs. The well and the refrigerators come first. A car charger can pull about 11.5 kW on its own, so it usually waits with the pool heater, unless the family would need a charged car to leave. Past that, the order is a conversation with the client more than with the electrician. A family that works from home ranks the network above the wine room, and a serious collector may not. I’d have the electrician put the client’s answers on paper during design, while moving a circuit is still a line on a drawing.
This piece is general information, not a code review. Codes and standards are revised every few years and local adoption varies, so check current requirements with your building and fire officials before finalizing a design.

How to Spec a Rumford Fireplace
A Rumford is a tall, shallow masonry fireplace that throws heat into the room instead of up the chimney. The code numbers to check, and the two details builders skip most.
A Rumford fireplace is a tall, shallow masonry firebox with side walls angled wide and a throat rounded so smoke slides up the chimney instead of tumbling back into the room. The angled walls throw heat forward as radiation, which is the whole reason the design exists. Benjamin Thompson, known as Count Rumford, published it in a 1796 essay on chimney fireplaces. The design stayed common until about 1850, when coal and gas heating took over. My interest in it is practical, where open fires are being restricted, a properly built Rumford may be one of the few a client can still light.
Tall, shallow wood fireplace with angled side walls in a heritage townhouse bedroom.
What Makes a Fireplace a Rumford
Rumford kept the back wall straight and vertical, and made it about a third as wide as the opening. The side walls, which he called covings, splay out from that narrow back, and he capped their angle at 135 degrees to the back. Above the fire he rounded the breast, the curved masonry that streamlines the throat so smoke moves through without turbulence.
Jim Buckley, whose company in Port Townsend, Washington, builds Rumford fireplaces and trains masons to build them, points out that many fireplaces called Rumfords have a back that slants forward partway up. He traces that version to a misreading of one small fireplace Rumford described as an exception. Thomas Jefferson built Rumfords at Monticello but widened the back to half the opening, writing in 1799 that Rumford’s proportions suited coal and were impractical for wood. His bedroom fireplaces measured three feet three inches across the front and three feet high. By Buckley’s reading, Jefferson kept the back straight and skipped the rounded breast.
How Shallow Can a Wood Burning Fireplace Be?
The International Residential Code, the model code most states build on, requires a masonry firebox at least 20 inches deep. Rumfords get their own exception. They can be as shallow as 12 inches, as long as the depth is at least a third of the opening’s width. The throat has to sit at least 12 inches above the lintel, and its area has to be at least one twentieth of the opening’s area. Local versions carry amendments, so the edition the building department adopted is the one that counts.
The tall opening has a second consequence that shows up on the floor plan. The required hearth extension steps up once the opening reaches six square feet, 16 inches in front and 8 at each side below that, 20 and 12 at or above it. A 36 inch square Rumford opening is nine square feet, so it takes the larger hearth even though the firebox behind it is shallow.
The Mantel Gets Less Room Than It Looks Like
The same code lets wood trim sit directly on the masonry face, but nothing combustible can sit within six inches of the opening. Above the opening and within 12 inches of it, a combustible piece can project only an eighth of an inch for every inch of distance, so a shelf 12 inches up can stick out an inch and a half. On a tall opening, that pushes any real wood mantel shelf high on the wall. The clean answer is a stone or plaster surround up to that line, with wood starting where the code gives it more room.

Close view of a masonry firebox with soot darkened firebrick.
Where an Open Fire Is Still Allowed
Air quality rules on new fireplaces tend to fall into two kinds. The San Francisco Bay Area’s air district bans wood burning devices in new houses outright, even ones that meet federal emission standards. Other places allow fireplaces that have been tested and certified under an emissions limit. Washington works this way. Rumford fireplaces built from components sold by Buckley’s company were tested by an EPA certified lab, came in under the state’s particulate limit, and are certified by the state. According to his installation manual, certified units can burn even on Stage I burn ban days. In a region with an outright ban, that certification changes nothing. The local air district decides whether there is a chimney to draw at all, and that’s worth checking before anyone sketches one.
Rumford’s 1798 Complaint Still Applies
Two years after his first essay, Rumford published a second one, written mostly to correct workmen who had skipped rounding the breast and pushed the covings wider than he allowed. Buckley still sees the missing curve today, along with the slanted backs. The code’s exception covers depth and throat size and says nothing about either, so the straight back and the rounded throat have to be asked for by name. If you’re a mason who still builds that curve, I’d like to see your work. The code will catch a firebox that’s too shallow. It won’t catch a throat with no curve.
Blown Glass Lighting Comes Three Ways
Hand blown glass lighting is made three ways, and the process decides how much a set varies and whether a reorder can match. What to ask about the mold, and what the ceiling has to carry.
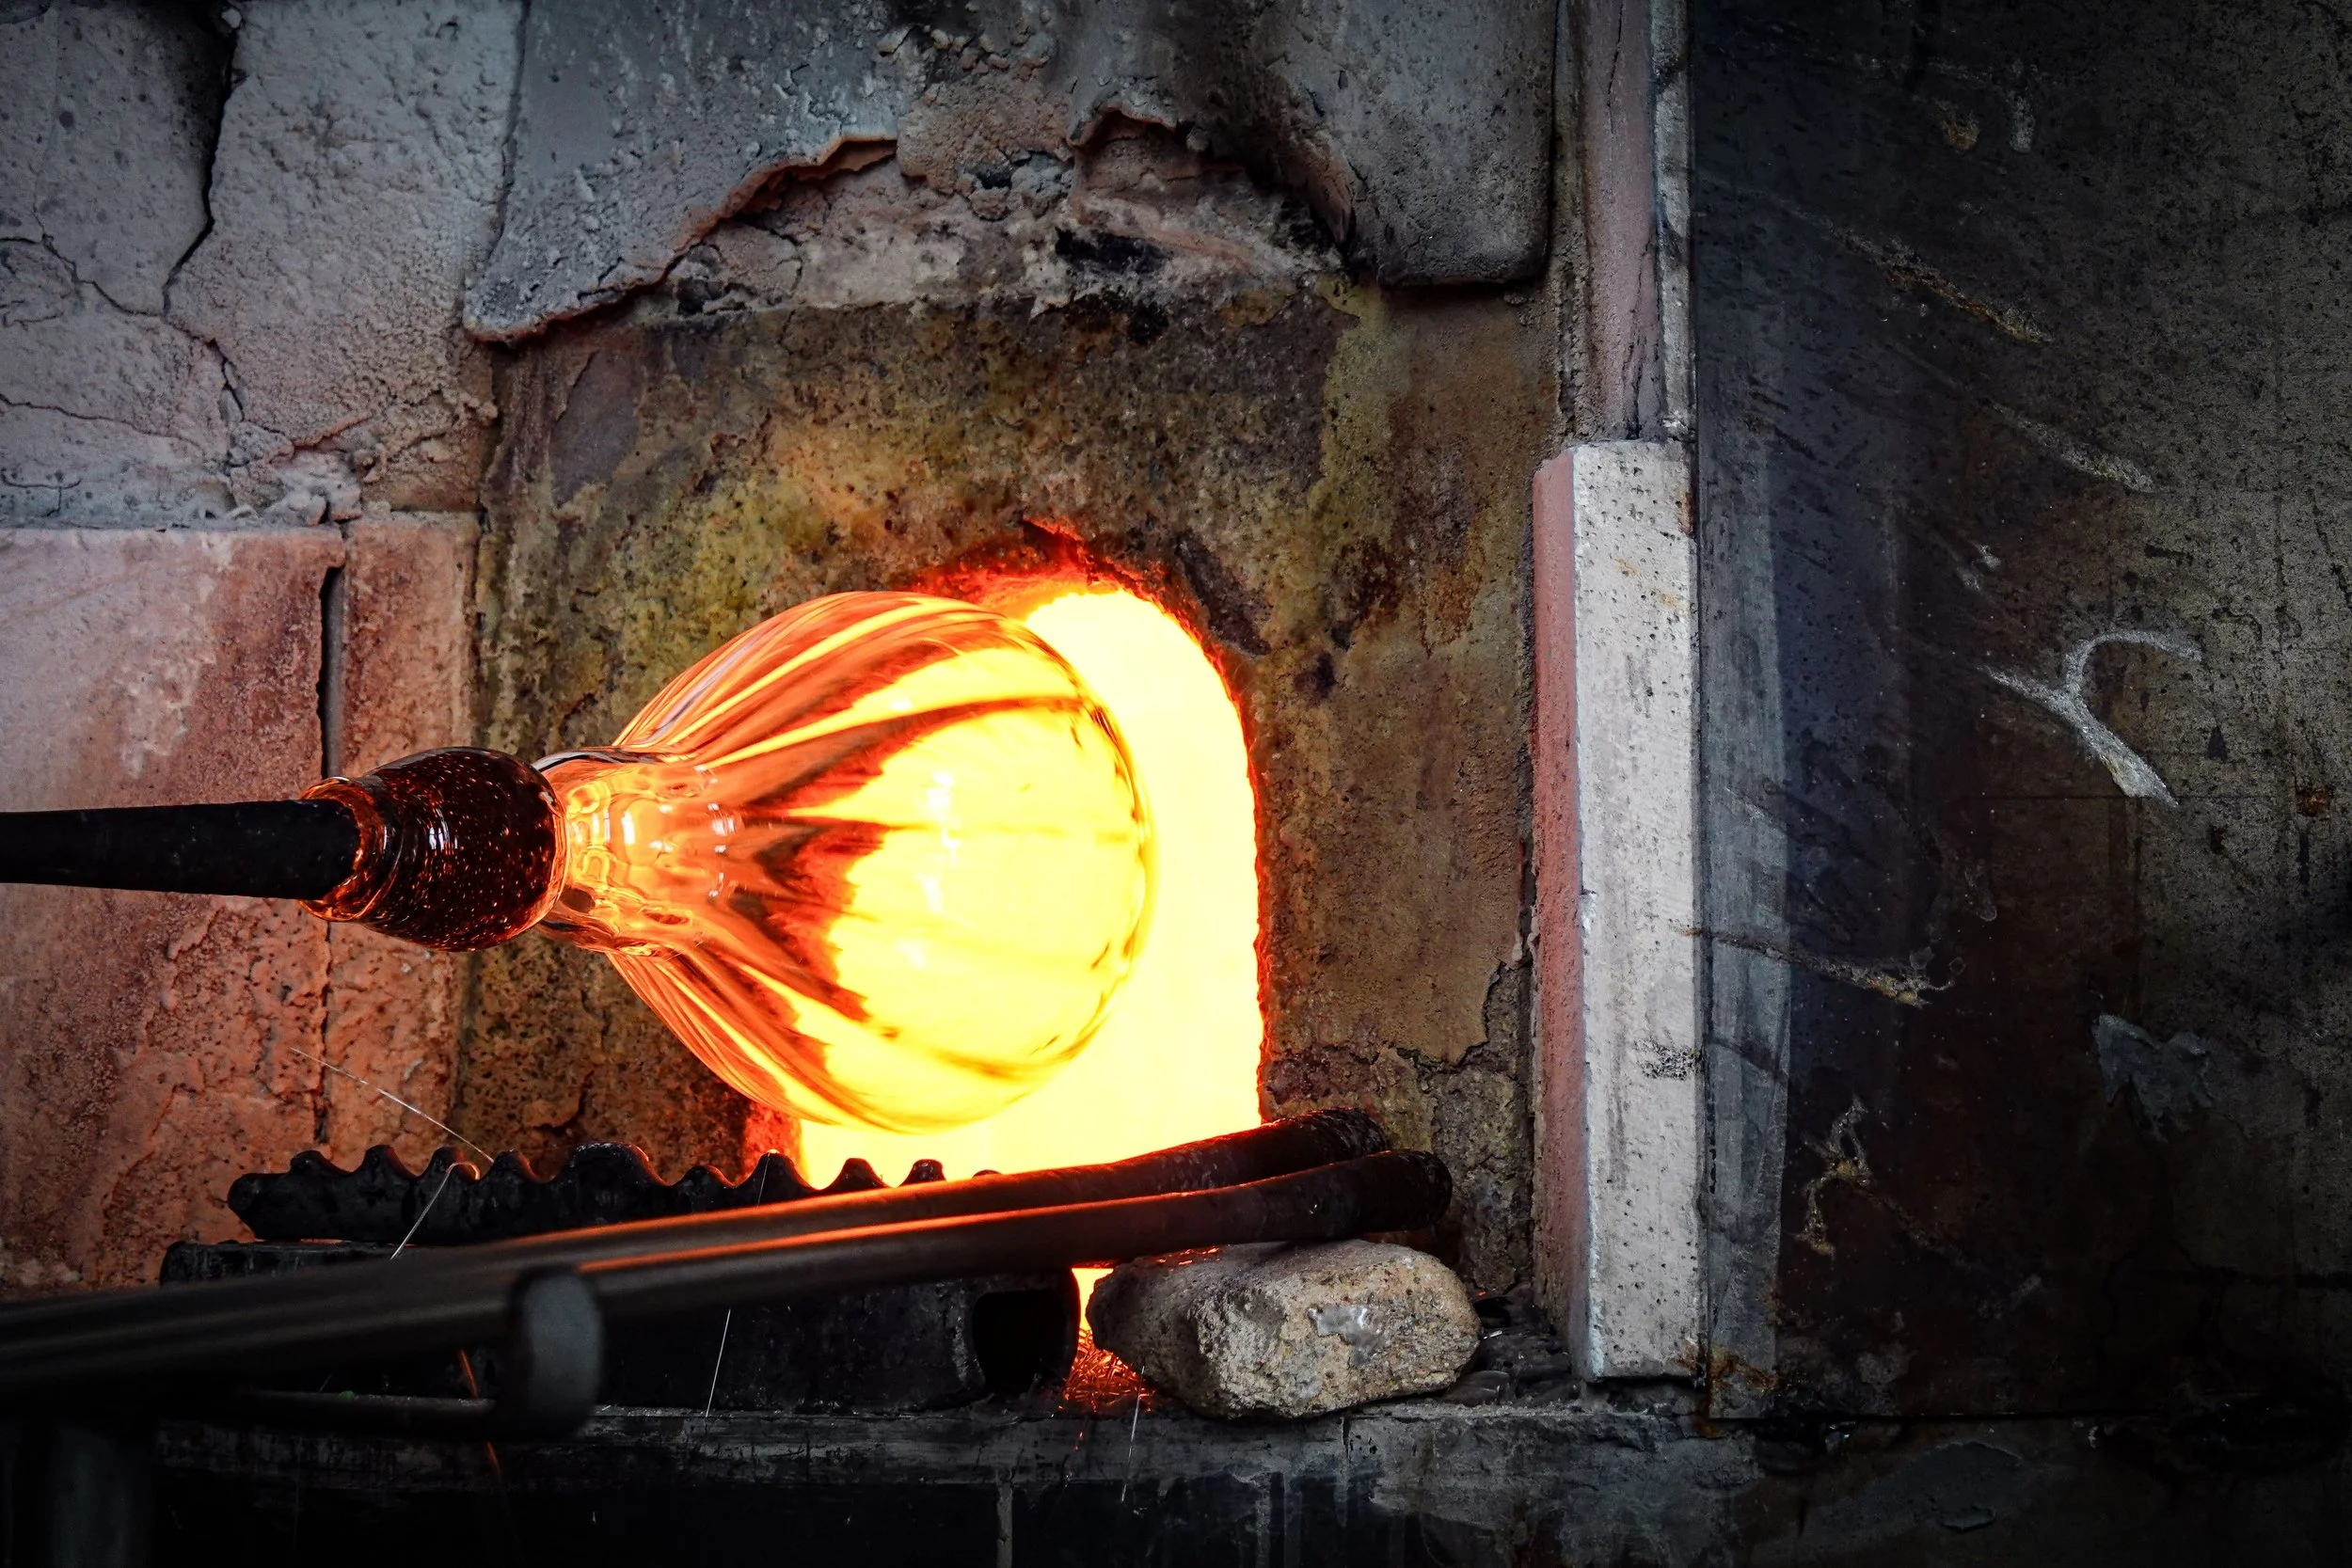
A sculptural hand blown glass fixture starts one of three ways, and the spec sheet rarely tells you which. Free blown glass is shaped on the pipe by breath and hand tools, with nothing around it but air. Mold blown glass is blown by mouth into a mold. Pressed glass is forced into a mold and never blown at all, which is why one piece looks exactly like the next. "Mouth blown" can honestly describe the first two, and which one you're buying decides how much a set will vary and whether a reorder can ever match it.

Cluster of free blown clear and smoke glass pendants hung at staggered heights in a double height stair hall.
Mouth Blown Can Still Mean Mold Made
Samuel Wilkinson's Blown pendant for &Tradition is mold blown. Its quilted texture was modeled in CAD, and each shade is blown into a mold by hand. One retailer describes that mold as 3D printed metal. A person still inflates every piece. The mold fixes the outline, so a row of them reads much closer to a matched set than free blown shades can.
How Much Should a Set of Blown Pendants Vary?
Free blown shades vary in size and wall thickness, and a good maker will tell you that's the point. Variation reads as intent in a cluster hung at staggered drops. In a straight row it reads as a mistake, because the eye compares each shade to the one beside it. Decide which the room needs before choosing the process. For a row, ask the maker for the real size range across the whole run, not one nominal dimension on a drawing, and lay out the hang so the two most different pieces never sit side by side.
A Wooden Mold Burns a Little Every Time
Czech glassworks such as Moser and Harrachov carve many of their molds from wood, most often beech. Moser's mold maker says pear gives the better surface but is scarce, so beech does most of the work. A tree takes up to thirty years to grow big enough. The wood is kept wet, and when hot glass meets it, a film of steam forms between them that mostly keeps the glass off the wood. Mostly. Each piece chars the inside a little more, so a wooden mold has a working life. Blenko in West Virginia carves its molds from cherry and gets up to about 1,000 pieces from one before it has to be replaced.
Metal lasts longer, but with no steam cushion the glass touches the mold directly. Blenko credits the thick steel of one mold with the orange peel texture on its most popular water bottle. It also notes that a mold where the glass isn't turned while it's blown loses fine detail and tight curves faster than one where it spins.
A crisp pattern cut into a wooden mold can soften over a long run. A reorder depends on the mold surviving. Moser describes soaking an old mold in hot water overnight when an order comes back years later, and it's usable the next day "if all goes well." So ask whether the mold is wood or metal, and whether the studio keeps it once your order ships.
How to Tell Real Murano Glass Lighting
Murano glass has a legal mark of origin. Vetro Artistico Murano was set up under Veneto Regional Law 70 of 1994 and is managed by Promovetro, the consortium of the island's glassmakers. Only licensed producers can apply it. It goes on as an adhesive label that carries the producer's number code, with the name printed in gold leaf. A label can come off, so ask for the producer number on the paperwork too. A listing that says "Murano style" is telling you where the glass wasn't made.
Glassblowing studio.
What the Ceiling Has to Hold
Blown glass is heavy, and sculptural pieces are heavier. One Lasvit pendant of Czech glass blown into a beech mold is listed at 6 kilograms, about 13 pounds, and a cluster multiplies that on a single canopy. A ceiling box carries only so much weight, and a box built for more is marked inside with its limit. Anything beyond that has to hang from its own support tied into the framing. Free blown walls vary in thickness, so the weights vary too. Get the weight of the heaviest piece from the maker and hand the cluster's total to whoever frames the ceiling while blocking can still go in.
The Mold Is Part of the Order
In a free blown set no two pieces match, so a broken shade comes back as a sibling, never a twin. A mold blown set can be extended for exactly as long as its mold survives. I'd want to know where the mold is before I fell for the glass. If you're looking past Venice, look outside Guadalajara. Archaeologist Karime Castillo names Tonalá and Tlaquepaque as the main centers of traditional glassblowing in Mexico, a trade that took root there in the early nineteenth century. The glass is what the client sees. The mold decides whether anyone can make one more.

Commissioning a Custom Light Fixture
A custom fixture rarely goes wrong in the making. It goes wrong in two questions designers forget to ask: is it listed, and who owns the shape?
Commissioning a custom light fixture means taking it through a maker from sketch to installation. The steps are a brief, shop drawings, a prototype when the design calls for one, fabrication, and delivery. The making usually goes well. What catches designers out is the label an inspector looks for and the contract clause about who owns the shape. A fixture made for one room is the part of this trade I most want to show, so the process is worth knowing well.
A long blackened metal and glass pendant hangs through a double height entry in a desert modern home with plaster walls and a stone floor.
What the Maker Needs Before Drawing
A maker can start from a napkin sketch or a finished CAD file. One American custom shop told a trade magazine that both are routine. What a maker can't start without is the room, the ceiling height, what the fixture hangs from, the light output the space needs, and how it will be dimmed. If a lighting designer is on the project, the fixture already has a line on the luminaire schedule, and that sheet is the one to hand over. I'd settle the driver with the maker at this stage too, before the electrician has to match one later.
Makers handle the drawings differently. Sattler, a German manufacturer, doesn't produce detailed CAD until the order is placed, to avoid unnecessary work early in a project. Hammerton supplies full scale drawings set into the architectural plans, so the fixture can be judged in place. Either way, the shop drawing is the document that counts. Once it's signed, it is the fixture.
Where the Prototype Fits
Dernier & Hamlyn, a British bespoke lighting manufacturer, prints prototypes in 3D in its own studio, so a client can see the form of a shade or a canopy before it's fabricated. Some of those printed parts end up in the finished fixture. Sattler says a prototype is sometimes needed to check that a design can be made in practice. For a pendant scaled to one particular stair void, I would ask for one even when it isn't offered.
When the Clock Actually Starts
Lead time runs from written approval of the final drawings and the deposit. The first meeting doesn't count. Hammerton releases a design to production only once both are in hand, and only after materials and finish samples have been signed off. Sattler's production time depends on how new the design is, so a change to an existing fixture moves faster than one developed from nothing. Ask the maker for the lead time in writing, counted from the approval date. Put that date on the project schedule and work backward from the day the ceiling closes. Every week spent revising the drawing comes off the end.
Does a Custom Light Fixture Need to Be UL Listed?
The National Electrical Code requires luminaires to be listed, and a one of a kind fixture usually isn't. Randy Hunter, a master electrician and electrical code instructor, wrote in IAEI Magazine that custom units are typically not listed by a nationally recognized testing laboratory and usually need a field evaluation. He called out fixtures from foreign makers unfamiliar with American certification as the common case. He also advised inspectors to tell contractors at the start of a job, before the products arrive, that they will be checking.
A field evaluation inspects that one fixture for the place it will hang. UL Solutions does them, and anyone involved in the project can request one. The result is a UL Evaluated label rather than a UL Listing, and the local inspector still makes the final decision. UL's own literature recommends scheduling the evaluation before an inspector rejects the installation, not after.
The question for the maker, before any deposit, is this fixture listed, and if it isn't, who arranges the field evaluation and who pays for it?

A scale drawing of a pendant light, metal and glass finish samples, laid out on a work table in a study.
Who Owns a Custom Fixture's Design
An Architect magazine article on design ownership pointed out that clients often assume they own what they paid for, and that they may not. Without a written agreement, an independent designer generally keeps the copyright on the drawings. That article was about lighting plans. A fixture brings in a second party with a stake. A trade magazine profile of American custom lighting makers noted that custom pieces often end up in a maker's standard collection. Some makers file design patents on a fixture's ornamental shape, and a design patent runs 15 years.
That is how a maker builds a line, and there's nothing underhanded about it. But a client who paid for a pendant shaped to their staircase may not expect to find it in a catalog two years later. If exclusivity matters, it has to be written into the contract. A contract like that deserves a read by an attorney who knows intellectual property.
A Good Maker Has the Answers Ready
Serious makers have been asked about the label and the ownership many times. A shop that knows its listing status, and has a clear position on whether a commissioned piece can join its collection, has done this before. Hesitation on either one tells you something.
To the makers reading this, if you have good answers to both, I'd like to hear from you.
Trimless Lighting Starts in the Plaster
A trimless light line shows every flaw in the ceiling around it. What to specify for the finish and the drivers before the plaster goes on.
A trimless light line is a slot of light set into a ceiling or wall with no visible frame, and the hardest part of it is the drywall around it. Whether it still looks clean years later depends on the finish level and on where the drivers end up. Trimless describes the look. Mud in describes the method, the aluminum profile goes up before the finish, and its perforated flanges disappear under joint compound. That makes the plaster finisher the person who actually shapes the edge of the light. When I looked into how these lines fail, most of it traced back to the handoffs between trades that rarely talk to each other.
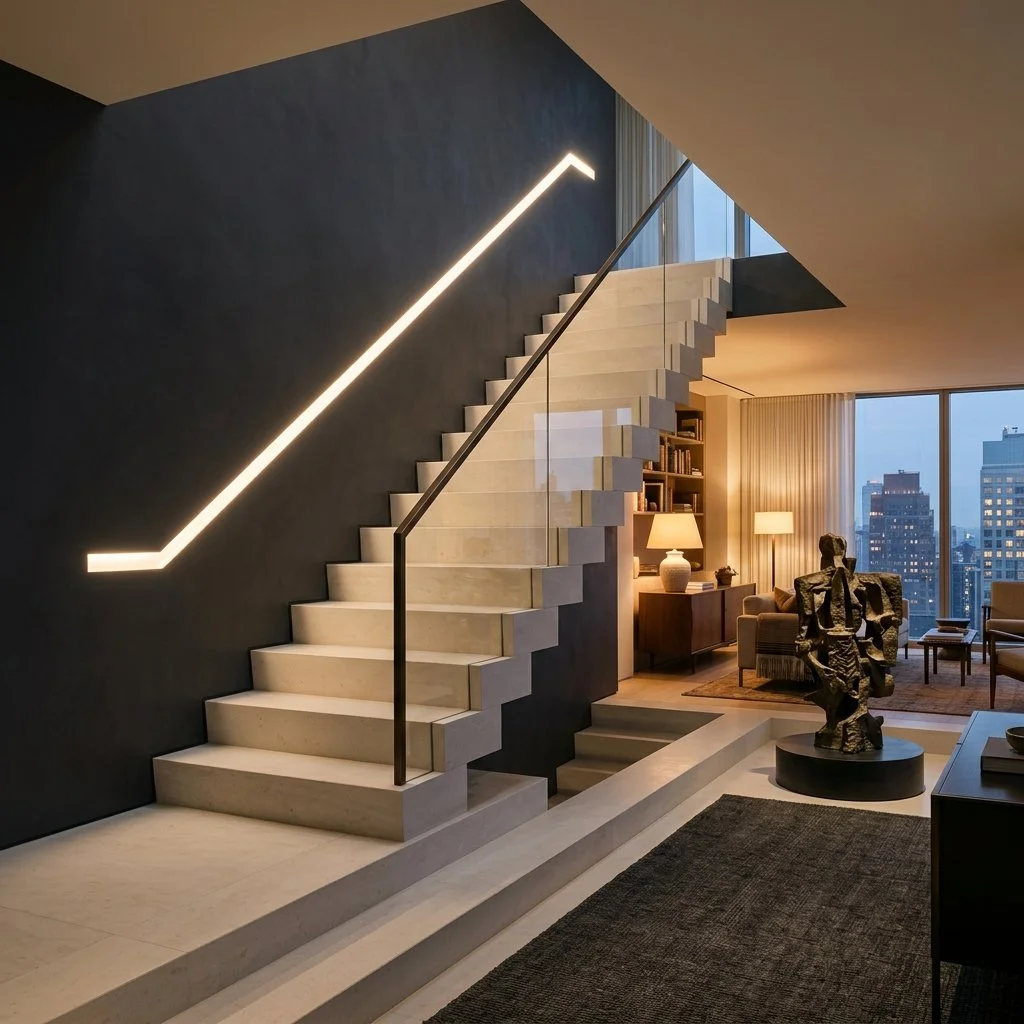
A city penthouse stairwell crafted from pale limestone features a smooth plaster wall with a continuous line of flush warm light.
The Line Exposes the Ceiling Around It
A line set flush in a ceiling throws light across the surface at a very low angle. The drywall trade calls this critical lighting. At that angle the outline of every taped joint shows, and so does any patch where the compound took paint differently than the paper beside it. Dark paint makes it worse, which matters the moment a client wants the ceiling in ink blue.
Under the Gypsum Association's finish levels, Level 4 is the standard for most projects, and National Gypsum notes its imperfections can show under harsh light. Level 5 adds a skim coat of compound over the entire surface. The Drywall Finishing Council goes a step further and says a Level 5 surface should be judged under its final lighting. Put that in the spec, so the walkthrough happens with the line switched on instead of under a work lamp.
Why Trimless Profiles Crack
When a crack opens along the line, the profile usually gets blamed. One installation guide for plasterboard profiles traces cracks to the work around the profile, or to the house moving. Dust left in the groove after cutting keeps the compound from bonding. A profile fastened more loosely than the board beside it gives when the structure shifts. The guide calls for fastening the profile as firmly as the gypsum board, with a screw every 20 to 30 centimeters on each side, and covering the opening before plastering starts.
Some systems ship with a sacrificial diffuser, a throwaway lens that protects the LEDs during the finishing work and gets swapped for the permanent one at the end. Others rely on contractor's tape over the channel, and one maker's own instructions warn against leaving it on more than a week. Ask which kind you are specifying.

Swedish country bedroom, a mid height pale wood panel headboard, flush ceiling lighting, and a large window.
Plan for the Day Something Fails
The LEDs are only half the system. A driver steps line voltage down to the low voltage the line runs on, and each driver feeds a limited length. One manufacturer's layout shows a 96 watt supply covering about 12 feet of its brighter line. A long ceiling run means several drivers, and each one needs a home.
If that home is sealed above a finished ceiling, replacing a driver means cutting into plaster that just got a skim coat. One integrator's installation standard requires every driver to sit behind a removable panel that opens without damaging the finish, with slack cable left at each location.
The light source deserves the same question. Some systems built to be plastered in list field replaceable LED boards. Others have tape adhered inside the channel once the plaster is done. An industry standard for swappable linear LED modules does exist, but the first products certified to it are commercial fixtures, and I found nothing applying it to a line set into a residential ceiling.
Someone Has to Own the Line
The electrician wires what the drawings show, and the finisher works to whatever level the spec names, but neither one controls the angle the light hits the ceiling.
The fix fits on one page, issued before the drywall goes up. Give the finisher the profile's installation sheet. Specify Level 5 on every surface the line touches, and schedule its inspection for after the line is live. Mark each driver and its access panel on the drawings, and choose a profile that protects the LEDs during finishing and lets the boards be replaced later. Then put one name beside the line itself. On a project with a lighting designer, that is usually the designer. On a project without one, it is whoever wrote the spec, which is often you.

What a Lighting Designer Draws
An electrician wires the house safely and to code. A lighting designer decides where the light lands and puts every decision on paper, down to what each keypad button does.
An electrician's plan shows where the power goes. A lighting designer's plan shows where the light lands and exactly what puts it there. Both are drawn over the same floor plan, and on a custom house the designer often sees the first one and has to decide whether the second is worth paying for. I wanted to know what actually changes on paper. So I went looking for the documents themselves instead of the usual line about one trade being creative and the other technical.

A hallway in a restored heritage home with limewashed plaster walls, exposed ceiling beams, a vintage runner rug, and a rustic wooden front door centered at the far end.
What Does an Electrician's Lighting Plan Show?
An electrician's plan marks the outlets and switches on the floor plan, all wired to code. The National Electrical Code asks for surprisingly little: one lighting outlet with a wall control in every habitable room, and outside the kitchen and bath, a switched receptacle can stand in for it. A living room can meet code with a lamp plugged into the wall. The electrician owns the wiring and the electrical loads, which is real work, and nothing in the code asks for more.
The Documents a Lighting Designer Delivers
The core drawing is a lighting plan laid over the architectural blueprints. It marks the exact location and mounting of every fixture, along with its circuit. That plan has to agree with the reflected ceiling plan, which carries everything else on the ceiling, the air diffusers and smoke detectors included. Coordination is how a row of downlights ends up centered on a beam line instead of pushed off it to clear a vent nobody planned around.
Every distinct fixture gets a type label, and those labels lead to the luminaire schedule, the full list written for the electrician and contractor. The schedule is also where color temperature gets held at one number across every fixture type, so the downlights and the picture light read as the same warm white.
Then come the calculations. The IES residential recommendations put general kitchen lighting at 20 to 50 footcandles and the surfaces where food gets prepared at 50 to 100. A lighting designer checks the plan against targets like these before anything is ordered. Newer AI tools can render a convincing picture of a lighting effect with no photometric file or CAD drawing behind it, which is fine for showing a client a mood and no substitute for the math.
One piece of advice from veteran lighting designer Peter Romaniello stuck with me. If an architect hands over only a reflected ceiling plan, he says to ask right away for elevations, sections, and the floor plan, and possibly the furniture plan too. Light gets aimed at walls and tables, and neither appears on a ceiling drawing.
Where the Scenes Get Written Down
The electrician's plan shows a keypad as a symbol on a wall. The lighting designer writes down what each button does. That document is the control narrative, and it tells the rest of the team how the system should behave and which presets the house expects. The IES keeps it firmly separate from the sequence of operations, the detailed account of how each control responds.
In a house with a Dinner button in the dining room and a Night button by the bed, the narrative is where someone decides what those words mean. Dinner might mean the table at full brightness with the kitchen behind it dimmed low. Night might mean the hallway glowing just enough to reach the bath. The warmer evening scenes that support sleep get set here too.
Where Substitutions Happen
A symbol labeled pendant can be filled by any pendant. A schedule line naming the studio and the exact model is much harder to swap. In one trade discussion of independent practice, a lighting designer described the projects that go wrong. The contractor swapped in inferior products, or installers who didn't know the products put them in incorrectly. That designer's answer was to supply and install the fixtures personally, which is its own argument and leads straight to how a lighting designer gets paid. This is the part I care about most, because it decides whether a maker's work survives the job. For a pendant blown by hand in a small studio, that schedule line is what protects it from a lookalike.
Ask How the Lighting Designer Is Paid
When the International Association of Lighting Designers formed in 1969, its founders barred members from selling lighting products, so a fixture choice couldn't be bent by a markup. In 2024 the association changed its bylaws. Member firms can now earn royalties on product design and profit on procurement. Critics worry that even a disclosed royalty arrangement could tilt a design decision away from the client's interest. Neither business model is wrong. A designer bringing one onto a project should still ask plainly whether the fee comes from the client alone or partly from the fixtures being specified.
Study featuring ink blue limewash walls, a pale oak desk lit by a spotlight beneath a painting, and a faded rose linen desk chair.
The Visit After Dark
Adjustable downlights are built to be aimed precisely, even after installation. Lighting meant to be seen at night is easiest to judge at night, once daylight stops competing with it. An electrician's work is finished when every fixture turns on. Aiming each one at the painting or the stone wall it was drawn for is a design decision. It's worth writing an aiming visit into the lighting designer's contract before the job starts instead of hoping for one at the end.
The Electrician Builds What Gets Drawn
An electrician will build what's on the page, and build it safely. The real difference between the two plans is how much is on that page. A plan with switch symbols and a code minimum gives every room light. A plan with a luminaire schedule and a control narrative behind it gives a house where the light was decided room by room before the first fixture went up. Most of what a client ends up loving about a house at night was settled on paper months earlier.
Good LEDs Dim All the Way Down
Fixing the buzz gets an LED working. Holding steady near dark is the real test, and that comes down to the driver and the dimmer working as a pair.
Dimming an LED is an electronics problem. An incandescent filament simply glowed less as the power dropped, all the way down to almost nothing. An LED depends on a driver, the small electronic part inside the fixture that controls its power. Whether that driver and the dimmer on the wall are matched decides if the light holds steady near dark or starts to buzz and flicker.
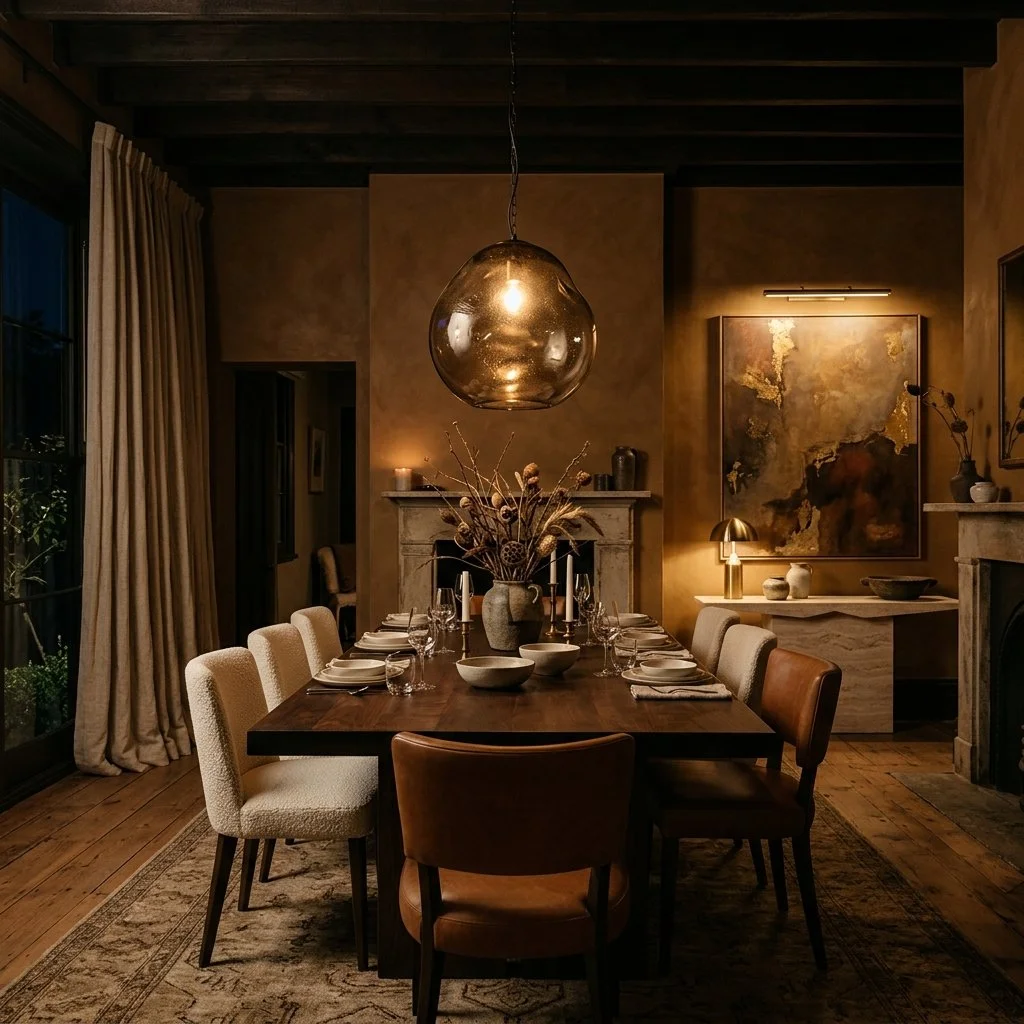
Dimly lit dining room in a restored heritage house, illuminated by a hand blown smoked amber glass pendant light.
The Dimmer on the Wall Was Built for a Filament
Most wall dimmers work by chopping up each cycle of household alternating current. A leading edge dimmer, the older TRIAC design, cuts off the front of every half cycle. A trailing edge dimmer, built around a MOSFET and sometimes sold as ELV, cuts off the back instead. Which end gets cut matters because the driver has to rebuild whatever is left into steady low voltage DC.
Leading edge switching is abrupt. The sharp jolt makes magnetic parts inside the driver vibrate at a frequency you can hear, and that's the buzz. Flicker usually has a different cause. A typical leading edge dimmer needs 40 to 60 watts of load to fire reliably, and an LED sold as a 40 watt equivalent might draw only 5 to 8. Put two or three of those on a circuit and the dimmer can't hold its switching point. The thing I kept running into while reading about this was how often the dimmer is older than every bulb it controls. The bulbs got swapped for LED, and the wall control installed for halogen stayed put.
One Percent Is Brighter Than It Sounds
Fixing the buzz gets a light working. It doesn't get it low. The eye reads dim light on a curve, not a straight line, so the bottom of the range looks far brighter than the number on the spec sheet. A driver rated to dim to 1% has a lowest setting the eye reads as roughly 10% of full brightness. I had assumed 1% meant nearly off. It means a room that still looks lit. Drivers built for deep dimming go down to 0.1%, and one lighting manufacturer's guidance puts museums and luxury interiors at 1% or lower.
Ordinary retrofit lamps, the kind that screw into a standard socket, sit at the other end of the scale. Many bottom out around 5 to 15%, and near that floor they misbehave in ways the trade has names for. Dropout is a light that cuts off before the slider reaches the bottom. Pop on is the reverse, a light that stays dark until you push the slider well up and then jumps to life.
Warm Is a Separate Question
Low and warm are two different specifications. Incandescent always warmed as it dimmed. An LED holds the same color all the way down unless the fixture blends in a second channel of warmer diodes as the level drops. The usual range starts near 2700 to 3000K at full brightness and falls toward 1800K at the bottom. That evening shift toward amber sends the body's clock less of the signal it reads as daytime, which is why warm dimming belongs in the same conversation as circadian lighting. A fixture can dim deep without warming, and a warm dimming fixture can still drop out well before the bottom. Each one has to be asked for on its own.
The Pairing Is What Gets Specified
None of these numbers belong to a single part. The driver and the wall control behave as a pair, and the fixture inherits whatever that pair can do. Testing funded by the Department of Energy at Pacific Northwest National Laboratory found that dimming performance swings widely with the exact pairing, and the worst problems show up near the low end. A "dimmable" label on the box covers none of that.
This matters most for a fixture made by hand. A glass pendant blown in a studio can look splendid at full brightness. At 3% on a weeknight, how it looks depends on a driver the glassblower may never have chosen. The question worth putting to whoever supplies it is which dimmer that driver was actually tested with, and how low the two go together before the light drops out.
The Dimmer Is Moving Into the Fixture
Wall dimmers keep getting better at the matching problem. Phase selectable models let the installer switch between leading and trailing edge on site, and adaptive models adjust to whatever load they find on their own. At the high end, the bigger shift is that the wall dimmer is going away. Some lighting systems put the dimming intelligence inside each fixture and send the control signal wirelessly, so there's no separate dimmer to pair it with, and the best of them dim down to 0.1%. One benefit I hadn't thought of is practical: when a table shifts or the art on a wall changes late in a project, the lights can be regrouped without rewiring.

Cozy bedroom corner at dusk, where the textured walls are softly illuminated by a warm glowing alabaster and aged brass wall sconce.
What Replaces the Slider
The control on the wall is changing shape too. A touch bar is the closest replacement for the slider: a smooth, flat strip you run a finger along to set the level, with a line of light showing where it sits. Some smart dimmers pair a lit bar with buttons that treat a tap differently from a long press. In whole house systems the slider often disappears entirely. A wall keypad with a few buttons calls up preset scenes, a dinner setting or a late evening setting, and each button sets every light in the room to a level someone programmed in advance. For the low end, this matters more than it looks. Once a scene is saved at 3%, nobody has to hunt for that level by hand again. The bottom of the range gets chosen once, carefully, and after that it's just a button.
The Level You Never Notice
A dining room at eleven at night is where all of this shows. If the low setting holds steady, with no hum from the wall and no flutter in the glass, the pendant glows the way its maker meant it to and nobody at the table thinks about the dimmer. If it doesn't hold, the dimmer is the only thing anyone notices. Both outcomes trace back to one decision made long before dinner, how the light and whatever controls it were matched
Outdoor Lighting Depends on Direction
Direction determines the effect in outdoor lighting. One fixture aims up from the ground, the other aims down from the canopy or eave, and the housing material matters as much as the beam.
Uplighting and downlighting are the two basic directions in landscape lighting. One fixture sits at ground level and aims up, the other mounts high and aims down, and everything else in the trade is a variation on one of those two.
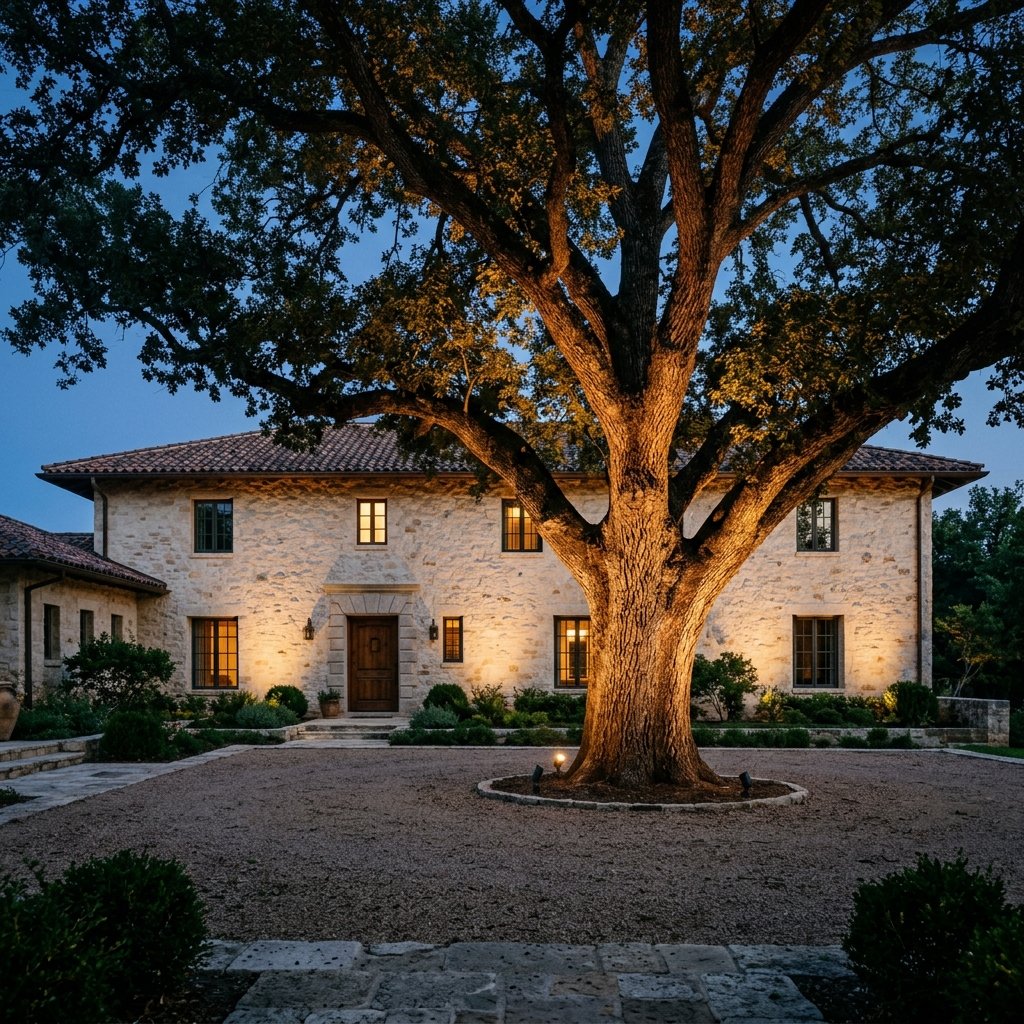
Restored heritage estate at blue hour, featuring a oak tree uplit with warm light before a stone facade.
Uplighting Reveals What's Already There
Uplighting places the fixture at ground level and aims it upward into a tree's trunk and canopy, or across a stretch of facade. The light rakes across bark texture and stone joints and catches the underside of leaves and branches, which is exactly why it works best on anything with real structural form and vertical presence worth revealing.
Downlighting Covers More Than One Effect
Downlighting is the broader category, and where the fixture sits changes the effect completely. Mounted under a porch roof, it works like practical overhead light over a patio or entry, the way a porch light always has. Moved up into a tree's own canopy, that same downward aim becomes moonlighting. I had always filed moonlighting as its own category until I looked into how the trade actually classifies it. Real moonlight never comes from below. It filters down through foliage, so a fixture aimed downward from within the canopy throws a soft, dappled shadow pattern across the ground. The pattern shifts on its own as the leaves move in the wind. It's the harder downlighting job by far, since the fixture has to be mounted and wired twenty feet or more up in the branches rather than staked into the ground, but it's the only downlighting technique that actually mimics how natural light moves overhead.
Wash Light Has a Different Job Entirely
Uplighting and moonlighting both pick out a single feature. Wash lighting does the opposite job on purpose. A wider beam angle, pulled back from the surface, spreads even illumination across something large and flat, a facade or a stretch of garden wall, so the surface becomes ambient background glow rather than a spotlighted focal point.
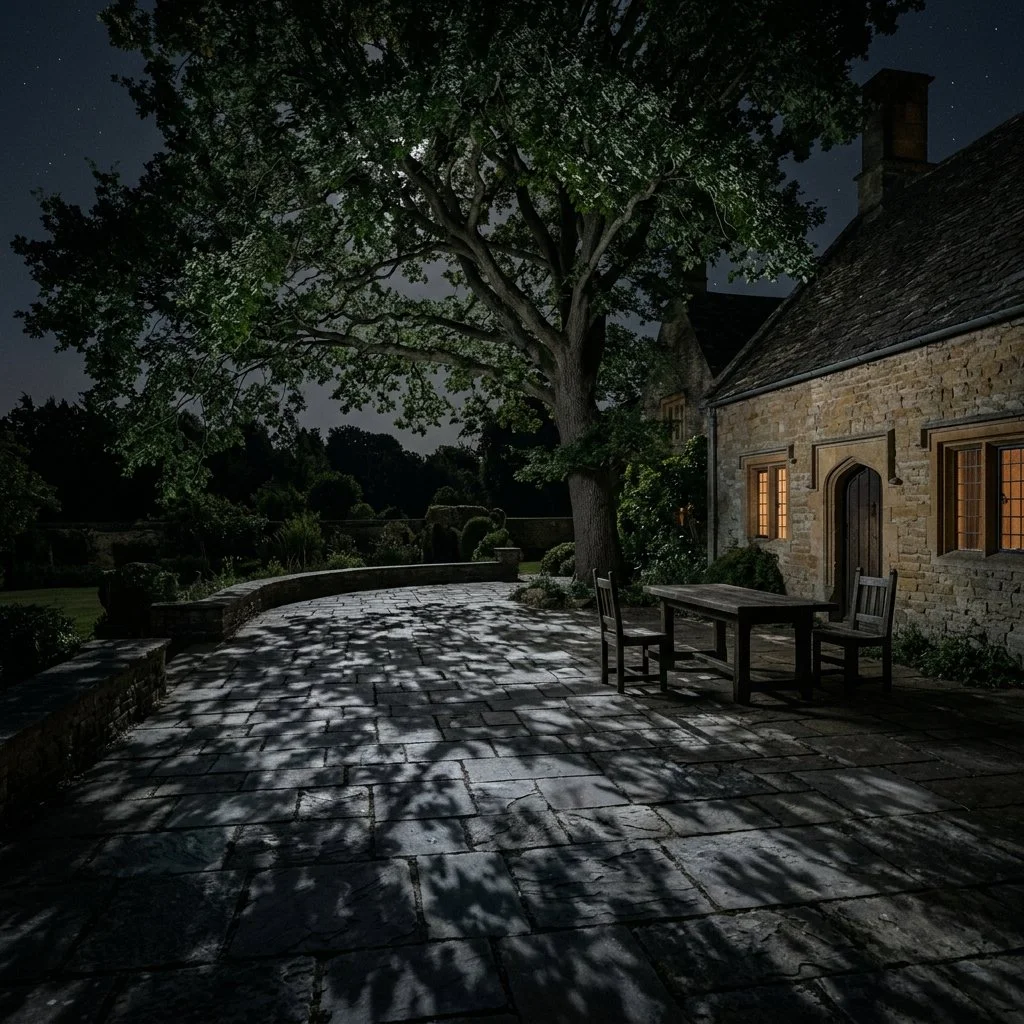
Heritage stone estate, where soft moonlight filters through a mature oak tree to project delicate leaf and branch shadows across worn stone pavers.
The Housing Has to Survive the Weather
A fixture that looks identical to another in a catalog photo can perform completely differently five years into a Pacific Northwest winter or a humid Gulf Coast summer. Most of the difference comes down to whether the metal protects itself or depends on a coating to do it. Solid brass needs no coating at all. Scratch it and there's more brass underneath, and it darkens slowly outdoors instead of failing. Copper behaves the same way. It forms its own oxide layer that shields the metal below it, which is why so many fixtures are brass bodies finished in copper.
Cast aluminum is lighter and cheaper, and a good powder coat can hold for a decade in a mild climate, less near salt air. The weak point is the coating itself. UV fades it and a string trimmer chips it. Once it's breached, the aluminum underneath corrodes into a chalky white residue. What surprised me is that the LED is often built right into the aluminum body, so when the housing goes, the whole fixture goes with it, long before the light source would have worn out. Plastic, the trade mostly doesn't bother defending.
A Garden Lit One Way Looks Flat
A landscape lit with only one of these techniques reads as flat no matter how well that single technique is executed. A real plan layers them the same way an interior lighting plan does. Uplighting picks out the trunks and stonework worth showing while wash light fills the broad surfaces behind them. Moonlighting is the one I'd hold back, because it depends on something no designer can supply. Direction decides the effect, and the metal decides whether it lasts. Neither one can make a young tree tall enough to hold a fixture twenty feet up. The fixture goes in over an afternoon. The canopy took decades.

The PVD Finish That Never Changes
PVD turns metal into vapor inside a vacuum chamber, then bonds it as a finish engineered to never change. How the process actually works, and which of the three real ways metal ages belongs in your project.
Physical Vapor Deposition is a real industrial coating process, developed for aerospace parts and surgical instruments long before any faucet manufacturer touched it, and it's now the standard finish behind some of the most expensive hardware in the world.
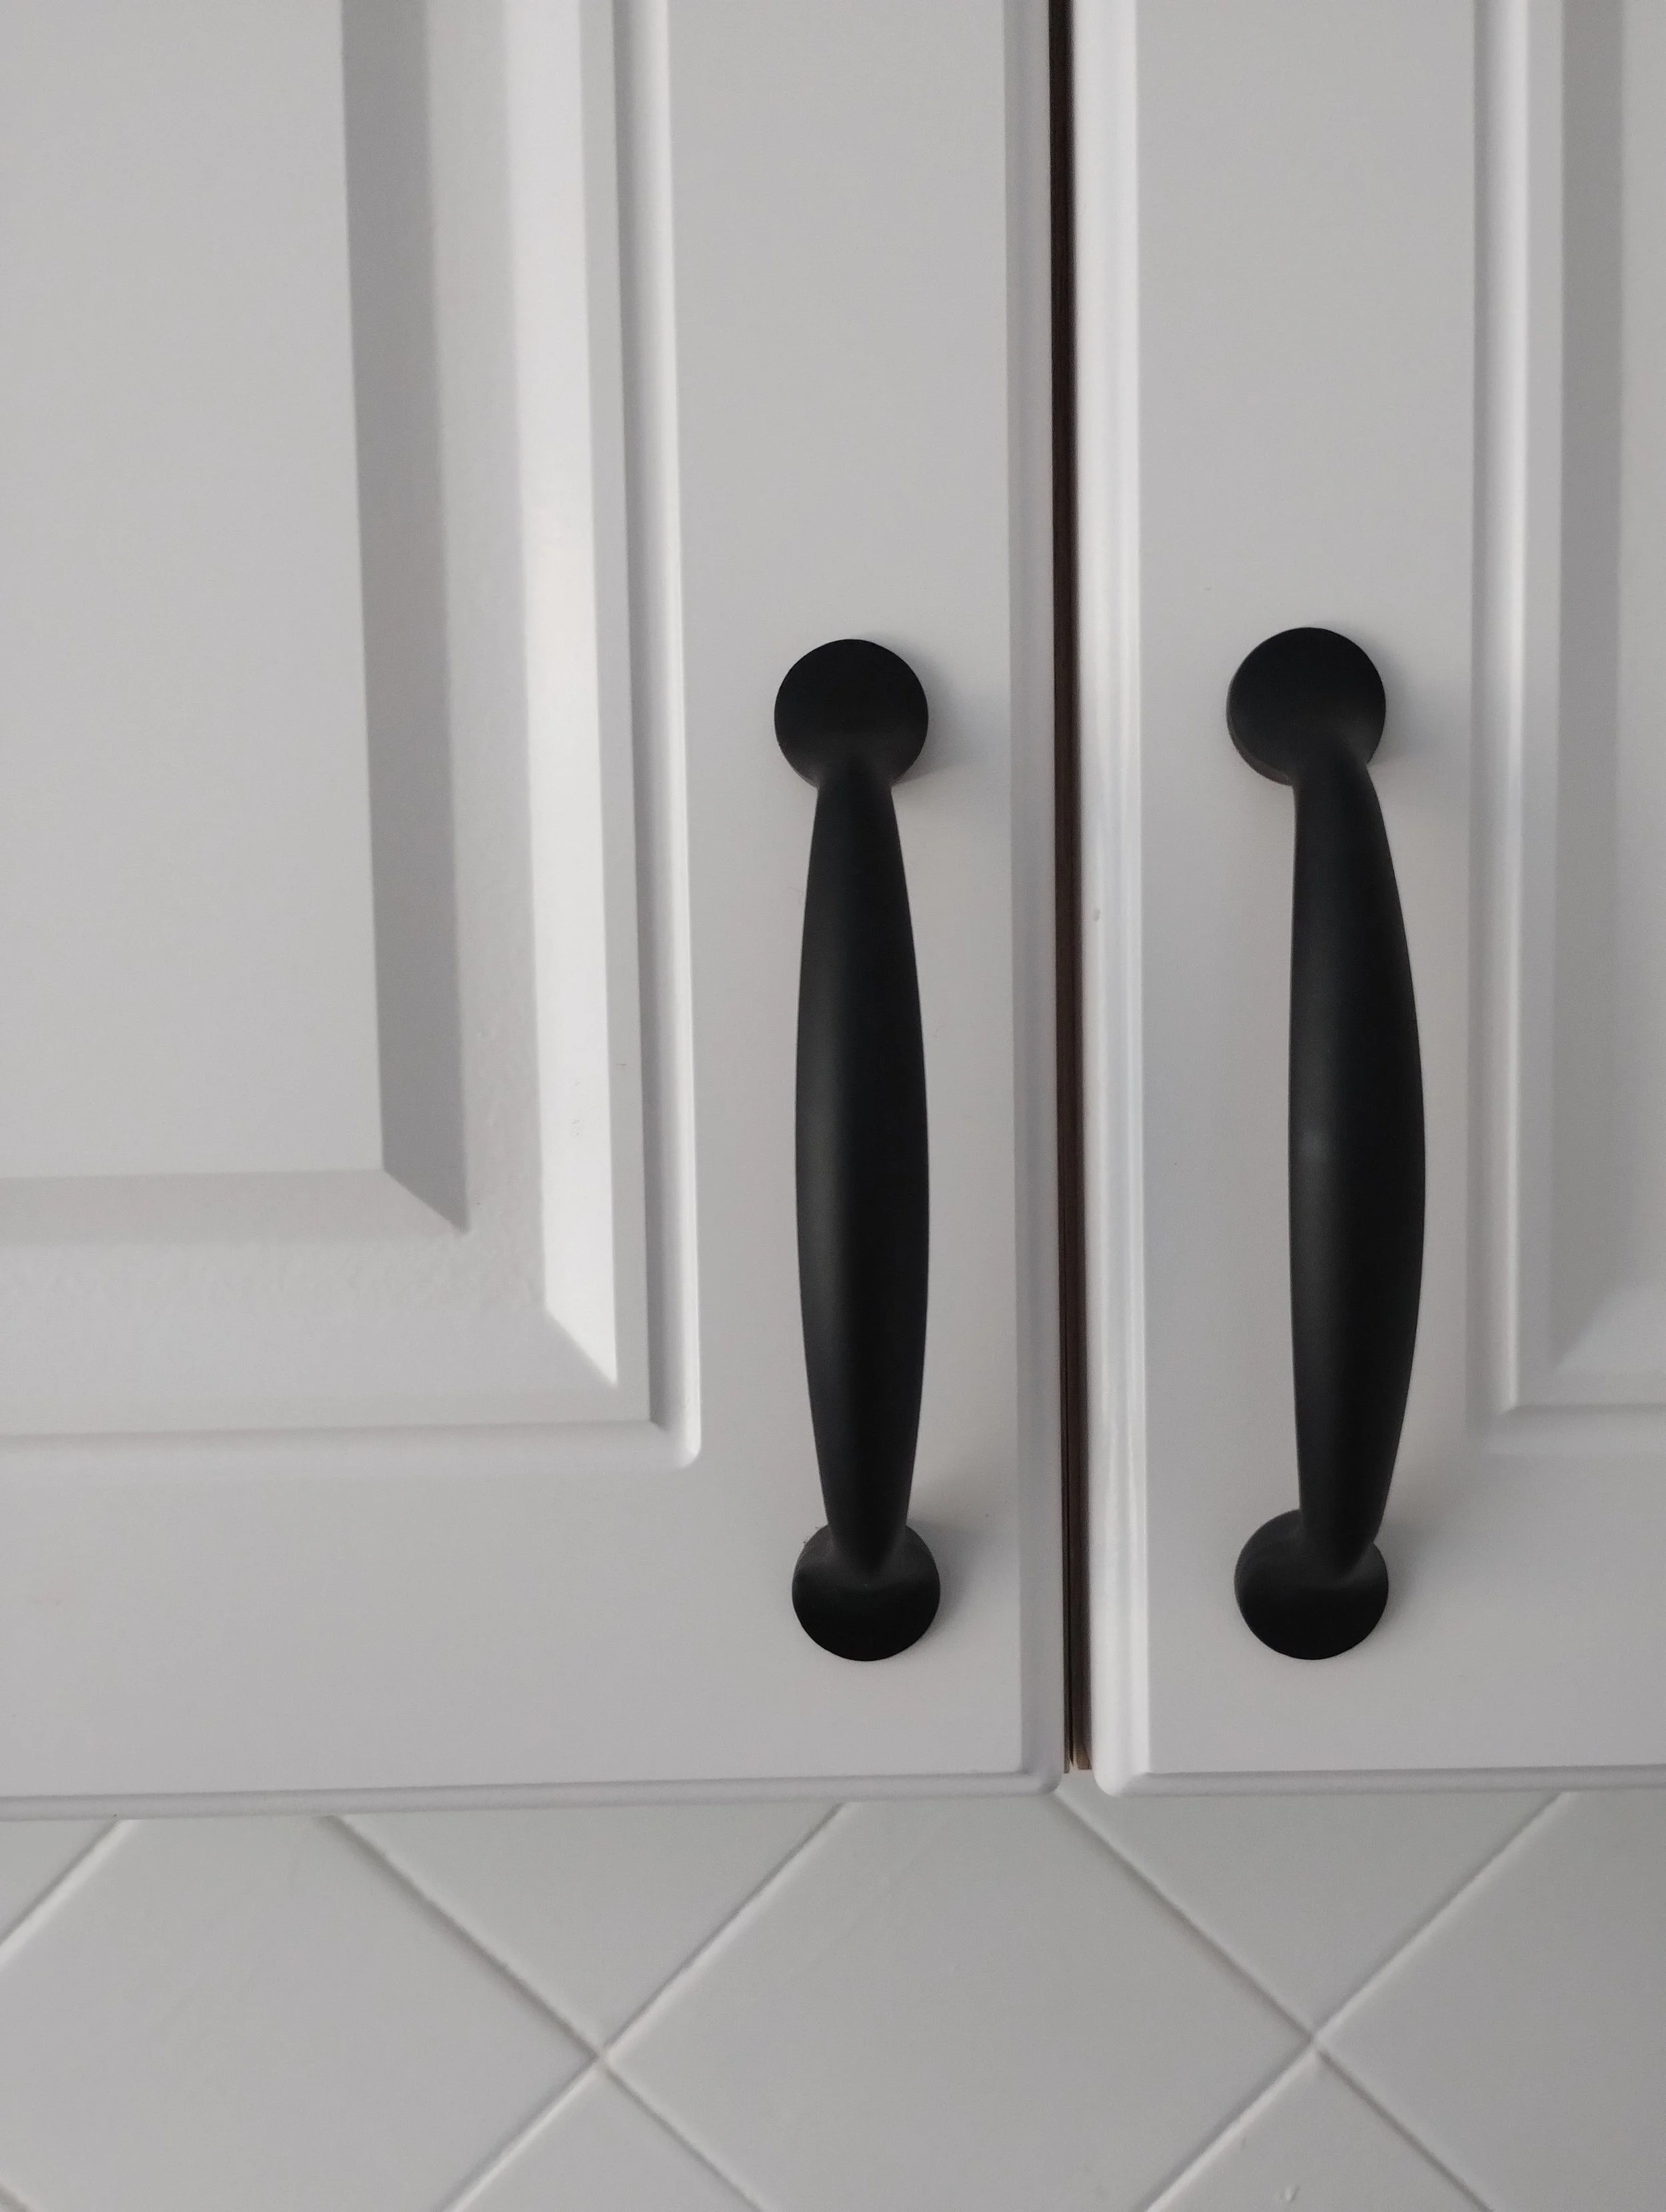
Hardware finished in PVD.
Aerospace and Surgery Got There First
I hadn't expected that, the same coating trusted on a surgical instrument is the one now sitting on a kitchen faucet. PVD's real client list still includes manufacturers of surgical instruments and aerospace components, industries where a coating failure has consequences a scratched faucet never will. Luxury hardware adopted the technology because durability that serious matters just as much on a countertop as it does on an operating table.
What Actually Happens Inside the Chamber
The process starts with a base that's already clean and polished, usually brass or stainless steel. That piece goes into a sealed vacuum chamber alongside a source metal, often titanium or zirconium, which gets vaporized and ionized until it becomes a stream of charged particles. Those particles cross the chamber and bond to the surface of the hardware, not sitting on top of it the way paint or electroplating would, but fusing to it at close to a molecular level. The coating that results is extremely thin, and testing has shown it can run many times harder than hardened steel.
Where the World's PVD Hardware Actually Comes From
Most of it starts in one part of northern Italy. I didn't know this until I looked, San Maurizio d'Opaglio and the surrounding Brescia region have manufactured faucets for generations, and PVD is now that industry's default finish rather than a premium upgrade. Workshops that once finished hardware with plating tanks run dedicated PVD lines instead, because the coating survives years of hard water and daily hands in a way a plated finish never fully could.
Modern faucet with a matte black PVD finish.
Colors No Alloy Actually Makes on Its Own
A living bronze finish only ever turns the colors bronze actually turns. PVD isn't limited that way. The same vacuum chamber that produces a gunmetal finish can just as easily produce a rose gold, a color that has nothing to do with what metal sits underneath the coating. That's the real trade off. A living finish tells you something true about the metal itself. A PVD finish tells you something true about a process, and the metal underneath could be almost anything.
Decide Which Kind of Metal You Want
Metal in this pillar changes in three real ways, not one look pretending to be a philosophy. It converts, the way blackened iron does inside a chemical bath. It lives, the way bronze and brass age depending on whose hands touch them every day. A PVD finish belongs to neither category. It's built specifically not to change at all, no chemistry required, no time needed. Knowing which of the three you're actually specifying matters more than knowing what color it comes in.

Why Moradabad's Brass Can't Be Copied
A river's sand, four centuries of hand-hammered brass, and the reason India gave Moradabad's craft its own legal protection. What genuine Moradabad brass actually requires, and how to ask for it.
In 2013, India gave Moradabad's brass a real, legal protection, a Geographical Indication tag, the same category that keeps a wine called Champagne actually from Champagne. It's tied to a place and a method, open to any real workshop in that city, not owned by one brand. That's different from the protections most people actually recognize. Christian Louboutin trademarked a color. Tiffany trademarked a shade of blue. Both lock a mark to a single company, and both have survived real legal fights to prove it. What earns a craft the wider, place based kind of protection isn't a company logo. It's the river.
Hand hammered brass bowl with a warm antique finish.
A Mughal Garrison Turned Metal Trade
Moradabad was founded in 1625, during the reign of Shah Jahan, and its metalworking history starts almost immediately after. Kashmiri artisans migrated to the new city under Mughal patronage, bringing casting and engraving knowledge that hadn't existed there before, and by the time Shah Jahan's court was at its height, Moradabad brassware was already reaching markets in Iran and Turkey. Artisans from Banaras and Agra followed and settled into the same trade. The city has been making brass, in other words, for longer than most Western luxury houses have existed at all, and it never stopped: by the eighteenth century the British East India Company was placing large brassware orders here for export, and Moradabadi lacquerware was still being shown internationally at the Wembley Exhibition in London in 1924.
The Sand a Government Now Protects By Name
The detail that actually stopped me, Moradabad sits on the Ramganga River, and the sand from that specific river is what artisans use to pack their casting molds. It's unusually fine and soft, fine enough to hold the crisp edge of a pattern that coarser sand would blur. I'd assumed a GI tag was paperwork until I found out that sand is part of the actual legal basis for the city's protection. That's not folklore dressed up as provenance. It's the reason a mold made anywhere else, with any other sand, produces a visibly softer result. Moradabad now supplies roughly eighty percent of India's domestically produced brassware, and this is one real reason nobody else has fully managed to replicate it at the same quality.
A Pattern Traced by Hand, Not Machine
Brass itself is nothing exotic on its own, an alloy of copper and zinc, sometimes with a touch of lead worked in for casting. What makes a Moradabad piece is what happens to it after casting. Artisans trace the pattern by hand, in a technique called nakashi, using small hand tools to cut floral and geometric patterns directly into the metal. A single piece can take hours to finish. No machine currently replicates this at the same fidelity, which is part of why pieces worked by hand still command a real premium over brass that's simply stamped by machine and sold under the same name.

Artisan hand chiseling a decorative pattern into a brass bowl.
What Moves From Furnace to Finish
The metal is melted in a furnace fired by coal, then poured into molds packed with that same river sand, shaped from wax or wooden patterns. Once cast, the piece goes through hand engraving and hammering before finishing, which might mean an antique brass patina or a high polish, depending on where it's headed. Every piece is checked for weight and finish before it ever leaves the workshop. It's a genuinely hybrid process, a hand technique centuries old, sitting inside a modern export operation, and both halves are real.
Ask for the Word Mark
A GI tag exists because a name got valuable enough to steal. Brass sold as Moradabad work, without the sand from that specific river and without a pattern actually cut by hand, isn't a lesser version of the real thing. It's a different object wearing the same label. When it's genuinely Moradabad brass, ask for it by the registered mark, the same way you'd ask a wine list for the actual appellation and not just the grape.

Porcelain Slab
Porcelain slab is fired clay printed to look like marble, not marble itself, which is the whole reason it exists. What that manufacturing process actually means for sizing standards, installation, and how to order one without a shade mismatch.
Porcelain slab is a manufactured material, pressed from clay and fired in a kiln, built to do one job, look like real marble without marble's problems. Real marble is porous. It stains from something as ordinary as red wine or lemon juice, and it etches on contact with anything acidic, permanently. Porcelain slab is fired hard enough that neither of those things happens to it. Manufacturers get the marble look by scanning an actual block of real marble at very high resolution, then printing that exact pattern onto the porcelain before it goes into the kiln. A slab that looks like Calacatta or Nero Marquina is porcelain wearing a printed image of that stone. It was never quarried.
Exterior building corner clad in large stone look panels with mirrored veining and visible reveal joints.
Four Hundred Bars and a Kiln Longer Than a City Block
Here's what actually happens to make that possible. The raw material is a dry blend of kaolin clay, feldspar, and quartz, pressed under more than 400 bars of pressure to force out air and moisture before it ever sees heat. It's then fired in a kiln that can run several hundred meters long, at temperatures between 1,200 and 1,400 degrees Celsius. At that heat the minerals fuse into a single solid mass, with almost no pore space left for anything to soak into. That's the physical reason porcelain doesn't stain or etch the way marble does: a finished slab absorbs less than 0.1 percent water. It's also why porcelain reads slightly cooler to the hand than real marble. The pattern printed on top depends on this same firing step too. Some slabs are decorated, meaning the print sits on the surface only, added after pressing. Others carry the print all the way through the body. Cut a decorated slab for a mitered edge and the exposed edge shows plain material underneath. Cut one where the pattern runs through, and the edge keeps the same veining.
Gauged Has a Real Definition
"Gauged" isn't a marketing word here. In 2017, the Tile Council of North America closed out four years and more than 4,000 hours of testing with ANSI A137.3, the actual standard for gauged porcelain tiles and panels. It splits the category into two thickness classes: 3.5 to 4.9 millimeters, rated for walls only, and 5.0 to 6.5 millimeters, rated for both floors and walls. A companion standard, ANSI A108.19, governs how it actually gets set in place, using a thin mortar bed rather than a thick one. Knowing which class you're specifying isn't a technicality. It's the difference between a panel that's approved for a floor and one that isn't, whatever the sales sheet implies.
Thin Doesn't Mean Forgiving
A slab this thin handles nothing like a stone countertop. Fabricators move it with suction lifters built for the job, not by hand. Every panel gets mortar applied to both the substrate and the back of the tile itself, and any gap in that coverage becomes a weak point. Wet and exterior work calls for full coverage, no exceptions. The substrate underneath has to be flat and structurally rigid before installation starts, because a gauged panel won't bridge an uneven surface the way a thicker material sometimes can.
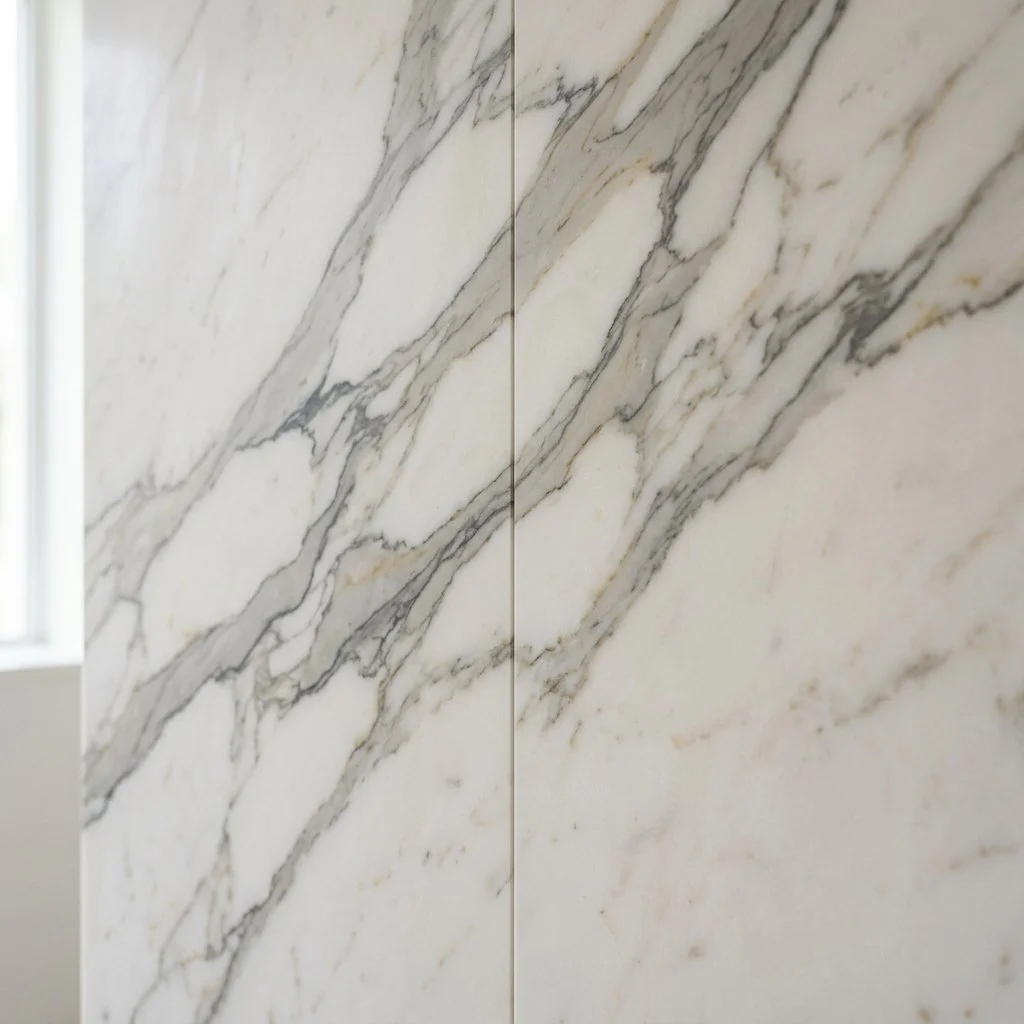
Close view of two large veined panels meeting at a seam, the pattern continuing unbroken across the join.
Specify the Run, Not Just the Pattern
Kiln temperature shifts, even slightly, from one production run to the next, and that shift shows up as shade variation between batches. The industry rates this on a V1 to V4 scale, from barely noticeable to intentionally dramatic. So there are two separate guarantees at play here, not one: the printed pattern is decided at the design stage and repeats reliably, but the exact shade of that pattern isn't, unless the whole job comes from a single production run. Every pallet is stamped with a batch number, and every box in an order should match it. Check that stamp against the delivery before a single carton gets opened, not after tile is already on the wall.
The Rules That Protect Talavera
Talavera looks like a color palette. Legally, it's a designation, tied to specific towns, six colors, and a hologram most imitations don't have.
The blue that makes Talavera instantly recognizable traces back to Chinese porcelain. It arrived by way of the Manila galleon trade, the shipping route that carried Ming Dynasty ceramics across the Pacific into New Spain, and colonial potters in Puebla took to that cobalt so completely it became the color the whole tradition is remembered for. Italian influence added the rest of the palette a century later. None of that history shows up on the label. What does, if the piece is real, is a hologram.
A pattern of hand painted tile lining a fountain in a modern courtyard.
A Name Only Six Places Can Use
Since 1997, "Talavera" has been a legal designation in Mexico, not a style anyone gets to claim. The Denominación de Origen de la Talavera, overseen by the Consejo Regulador de Talavera, ties the name to where a piece is made and to the clay and process behind it. Only a handful of places qualify: the city of Puebla and the nearby towns of Atlixco, Cholula, and Tecali, plus San Pablo del Monte across the state line in Tlaxcala. A tile in the right pattern made anywhere else, or made there with a shortcut in the process, doesn't get to use the word. Certified pieces carry a hologram to prove it.
Six Colors, Not One More
The design rule is just as specific as the geographic one. An authentic piece can only be painted in some combination of six colors: blue, black, green, orange, yellow, and mauve, and every one has to come from natural pigment, applied by hand. A printed pattern in a convincing blue and white isn't Talavera. Neither is a seventh color, however close it reads to the traditional palette.
Thrown, Painted, Fired Twice
The forming process hasn't changed much since the colonial period. Each piece is thrown by hand on a wheel, then fired, glazed, painted, and fired a second time, and the glaze itself is still a formula of tin and lead that workshops have used for centuries. It's slower than any mold or machine transfer print could be, and that's part of what the designation actually protects: not just a look, but the process itself, done by hand, not skipped.

Close view of a paintbrush adding blue pigment to a hand painted tile mid pattern.
A Craft That Nearly Didn't Survive
The tradition came close to disappearing more than once. Mexican independence broke up the guild that had kept quality consistent through the craft's golden age, and Puebla's workshops dropped from dozens to fewer than eight. By the 1980s only four remained. Artists and collectors pulled it back from the edge in the early twentieth century, and the 1997 law was, in part, a second rescue: a way to keep the workshops that had held onto the real process from being undercut by cheaper imitations. The craft still runs on a shrinking base of trained artisans.
Ask to See the Hologram
For anyone specifying it, the practical version of all this is simple. A real piece comes with a certificate and a hologram from the Consejo Regulador, and a workshop that can't produce either isn't selling what it says it's selling. The pattern is the least protected part of the whole tradition. The paperwork is the most.
Reeded Glass Isn't Fluted Glass
Reeded glass has raised ridges and fluted glass has grooves, but most suppliers sell both under one name. How to tell them apart, and what to put on the spec sheet instead.
Fabricators and suppliers will hand over the same pane under two different names. Reeded and fluted glass get used as if they mean the same thing, on cabinet doors and shower screens as often as on a spec sheet. They don’t. One has ridges that stand up off the surface. The other has grooves pressed into it. The distinction is real, even if almost nobody in the trade bothers to keep it straight.
A fluted glass panel in a blackened bronze frame casting a striped shadow pattern across a stone floor.
Two Different Rollers, Two Different Shapes
Textured flat glass is made by rolling, not floating. Molten glass, close to 1050°C, passes between two rollers cooled with water. One roller is smooth. The other is engraved with the negative of whatever pattern is going onto the glass. The ribbon comes out the other side around 850°C, then cools slowly in an annealing oven so it doesn't turn brittle. Whatever shape is cut into that engraved roller becomes the shape pressed into the glass.
That's where reeded and fluted actually diverge. Reeded glass takes its name from reeds and cane: the ridges rise up, convex, off the surface. Fluted glass borrows its name from a column, the same channels you'd find carved into a classical shaft: the grooves sink in, concave. Most manufacturers and showrooms use "reeded" to cover both, which is exactly how the confusion holds on.
A Patent Solved a Privacy Problem in 1886
This isn't a new idea dressed up as one. An 1886 English patent, filed by William Edward Chance, covered new machinery for rolling rippled glass sheets. A few years later, a second pair of rollers was added to press an actual pattern into a sheet that had already been rolled flat, one side textured, one side smooth enough to cut and glaze normally. Rolling the sheet twice, first flat, then patterned, became the standard way to produce it, and it's still close to how it's done now. The finished sheets were sold under names like "fancy figured rolled" and "patent rolled," in tints that read almost like a paint chart: clear, blue, amber, green, a pink tinted like wine and sold as "cathedral" glass. The purpose hasn't changed since. Obscure the view, keep the daylight.
The Ridges Do a Different Job Than Frosting Does
It's worth separating this from frosted glass too, since all three end up doing similar work in a spec conversation. Frosted glass is made by sandblasting or acid etching a clear pane, which pits the surface at a microscopic level and scatters light in every direction at once. That's what gives it a cloudy, matte look, opaque enough to hide detail but never sharp in any direction. Reeded and fluted glass work differently. The ridges or grooves are directional, not random, so they distort an image along one axis while still passing light through clearly along the others. Stand close and you'll see color and movement stretched into vertical bands, not a uniform blur.

A curved, fluted glass wine room enclosure backlit with warm light, wine bottles softly blurred behind the bent glass.
Architecture Took It Up in the 1920s
Rolled patterned glass had been a Victorian utility material for decades before it became a design statement. That happened in the 1920s and '30s, when its straight vertical lines fit naturally into Art Deco storefronts and partitions, an architecture already built around streamlined, repeating geometry. Modernist architects picked it back up again decades later for office interiors and cabinetry. The glass didn't change in either revival. The buildings around it did.
Specify the Pattern, Not Just the Name
None of this makes reeded and fluted glass interchangeable, even when the paperwork treats them the same. A convex ridge and a concave groove bend light differently enough that a rendering can look nothing like what actually ships. I'd trust the sample over the spec sheet every time. Hold it up to real light before the name on the order gets treated as fact.

Wood Furniture Fails From Neglect, Not Age
Two bottles both labeled "wood oil" work by opposite chemistry, and a white water ring means something very different from a black one. What walnut and oak each actually need, and how often to do it.
Two bottles on a hardware store shelf both say "wood oil." One is mineral oil, the kind sold for butcher blocks. The other is tung or linseed oil, sold for furniture. They look almost identical and do opposite things. Mineral oil never hardens. It sits in the wood's pores as a liquid indefinitely, which is exactly what you want on a cutting board you'll re-oil for the rest of its life. Tung and linseed oil cure. Exposed to air, their molecules cross link into a solid film inside the wood itself, the same reaction that dries a coat of paint, and once that film has fully hardened it actually resists water and wear instead of just temporarily repelling it. Use the wrong one on a table and you'll spend years reapplying something that was never going to build up, or wonder why a "protective" oil never actually protected anything.
A hand applying oil to a wood tabletop with a soft cloth.
Humidity Moves the Wood Before You See a Crack
Wood is hygroscopic. It pulls moisture from the air in summer and gives it back in winter, and the wood itself expands and contracts with that exchange whether or not you notice. Most guidance settles on keeping indoor humidity between 40 and 60 percent for solid wood furniture. Below that, the wood shrinks and finish cracks appear at the joints first, since that's where two pieces of wood are fighting each other for space. Above it, finishes soften and mold risk climbs. A drawer that suddenly sticks in August or a tabletop that opens a hairline seam in January isn't a defect. It's the wood doing what wood does, and a humidifier in winter does more for a piece's long term health than any amount of oil.
Read the Ring Before You Reach for Anything
A cloudy white ring under a glass and a dark brown or black one are not the same injury. White means the moisture only got as far as the finish. It's trapped in the lacquer or varnish layer, hasn't touched the wood, and usually lifts with gentle heat, a hairdryer held low and moving, or a warm iron over a folded cloth. A dark ring means water pushed all the way through the finish and into the wood fibers, where it reacted with the wood's own tannins. That one needs sanding and refinishing, not a hairdryer. The color tells you which repair you're actually facing before you touch anything.
Walnut and Oak Ask for Different Things
Walnut is one of the softer hardwoods used in furniture, which is part of why it takes an oil finish so well: the oil penetrates easily and the wood forgives the occasional dent. That's the piece that wants oiling worked in roughly once a year, more in a dry climate or near a heat vent, less if the room stays humid. White oak is denser, and its pores are naturally water resistant, so it tolerates a paste wax finish that simply sits on the surface rather than soaking in. Trying to oil a wax finished piece, or wax an oil finished one, mostly just builds up residue neither wood asked for.

Wood table surface with a faint water ring near a glass.
A Six Month Habit, Not a Sunday Project
Dust weekly with a dry or barely damp cloth. Wipe with the grain, not against it. Skip ammonia and silicone based polishes. They clean well the first time and leave a cloudy buildup that eventually needs stripping off with mineral spirits before anything looks right again. Keep the piece out of direct, sustained sunlight, since UV fades color and can craze a finish over years the same way it darkens a walnut floor unevenly under a rug. Every six months to a year, depending on how hard the piece is used, oil or wax again, whichever the finish calls for. That's the whole schedule. It's shorter than most people expect, and most of the damage I've read about in wood happens between reapplications, from a house that stays too dry all winter, not from the wood simply getting old.
Aging and Failing Are Not the Same Thing
Solid wood is built to change. A joint gives slightly with the seasons, and the color shifts in ways that have nothing to do with dirt. That's aging, and it's the reason solid wood earns the word heirloom in the first place. A joint that's cracked from a winter with no humidifier and a black ring from a glass left out overnight are a different thing entirely. That's neglect, and neither one was inevitable. The wood was never asking for much. It wanted the air kept steady and the right oil or wax applied on schedule, not attention only once something had already gone wrong.